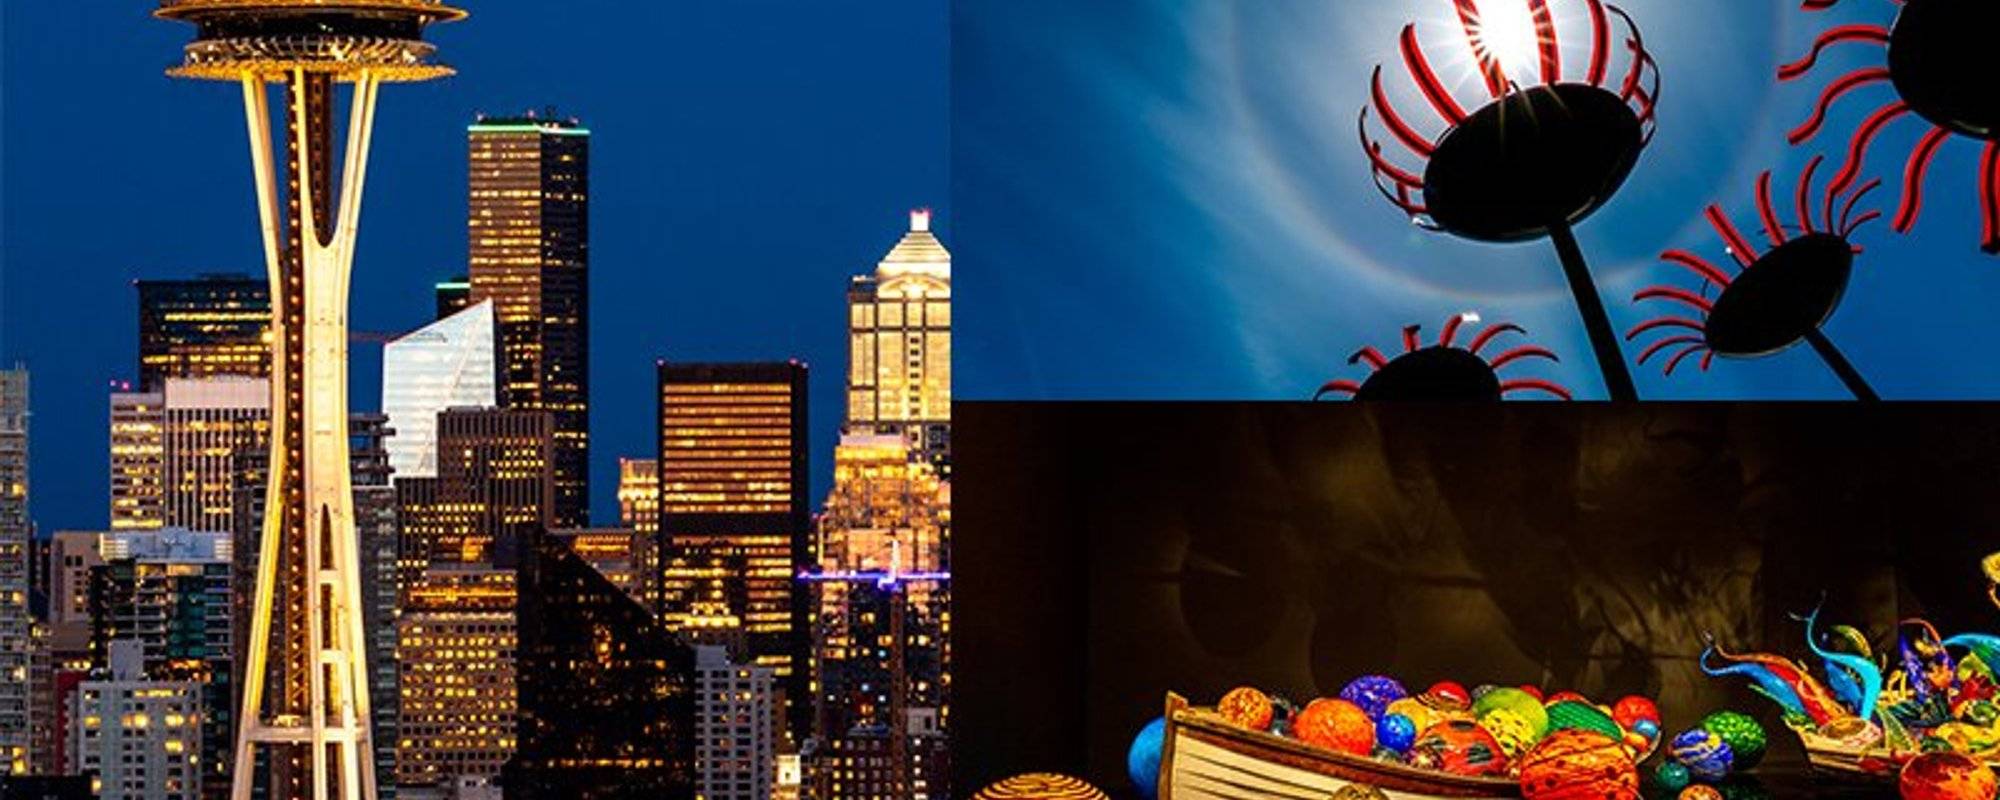
If anyone asks me what's one of my favorites cities in the United States to travel to is - I'd quickly reply "Seattle!". In this monster post I'll tell you all about my unforgettable trip.
If you're reading this - now would be a good time to turn on wifi as this is going to be a long one! I actually had to split this post into 2 as I got the error message "Exceeds maximum length (65KB)". I don't know what this means and if anyone knows please leave a comment below.I hope you enjoy reading this post as I put a lot of time and effort into it!
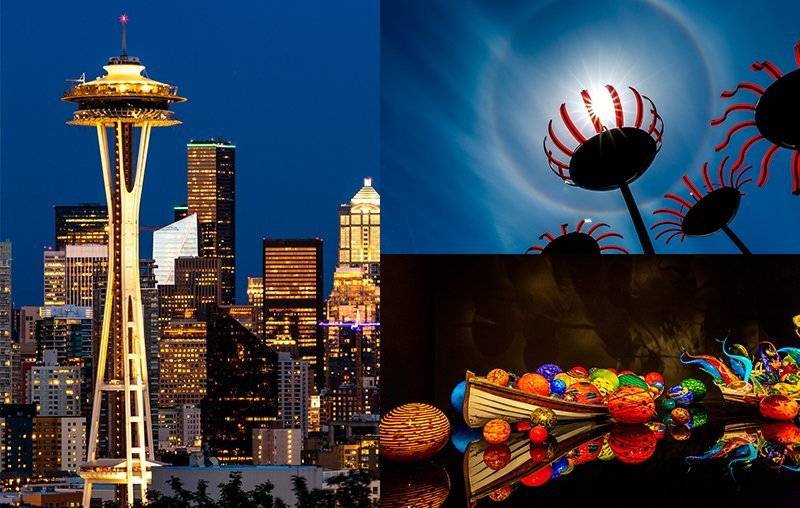
I’m super excited to share with you my Seattle experience as I absolutely loved it there! I'm going to split my trip into 5 posts to make things easier. As for this post, it's going to be a bit geeky but I know many of you reading this like to know what photo and video gear I use to capture amazing travel photos so here we go...
THE NEVER ENDING BATTLE
As a photographer I always battle with what I’m willing to bring vs how much am I willing to carry. The key is to make sure that whatever I do decide to bring I’ll actually use. So let’s talk about what I took with me…
CAMERA & LENSES
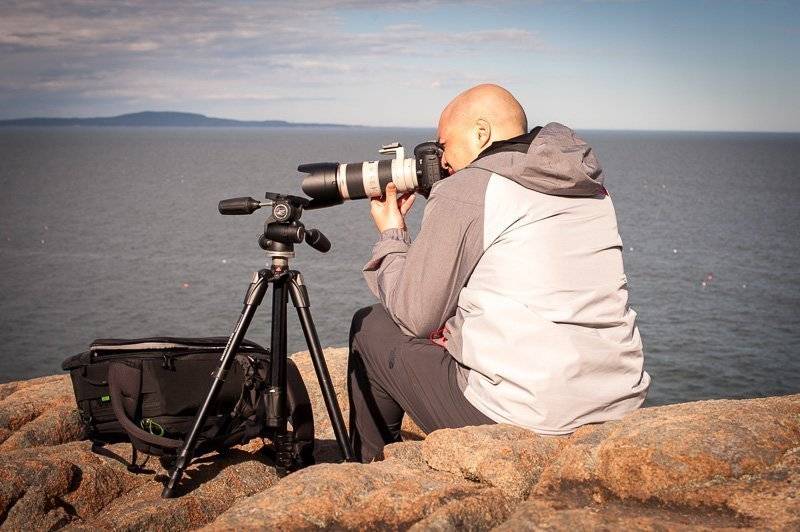
My stills camera was my trusty 5D Mark iii. Its been a workhorse and has traveled with me all across the United States and the world and has never let me down! Hopefully I didn’t just jinx myself.
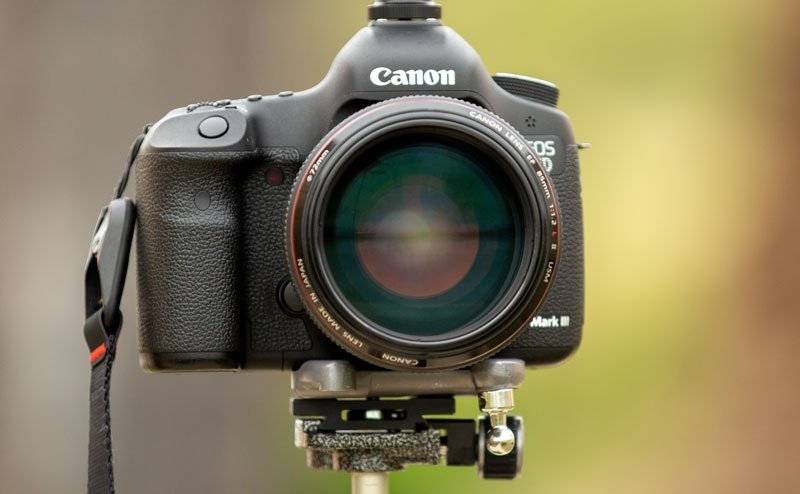
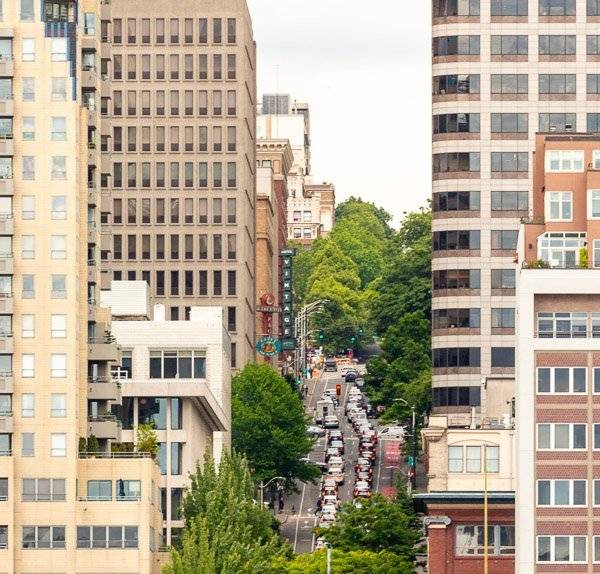
And speaking of workhorses, bringing my ultra wide 16-35mm f4 lens was an easy choice. It’s one of my favorite travel lenses as I can capture amazing cityscape, landscape and architecture shots. Every professional photographer definitely has this in their bag!
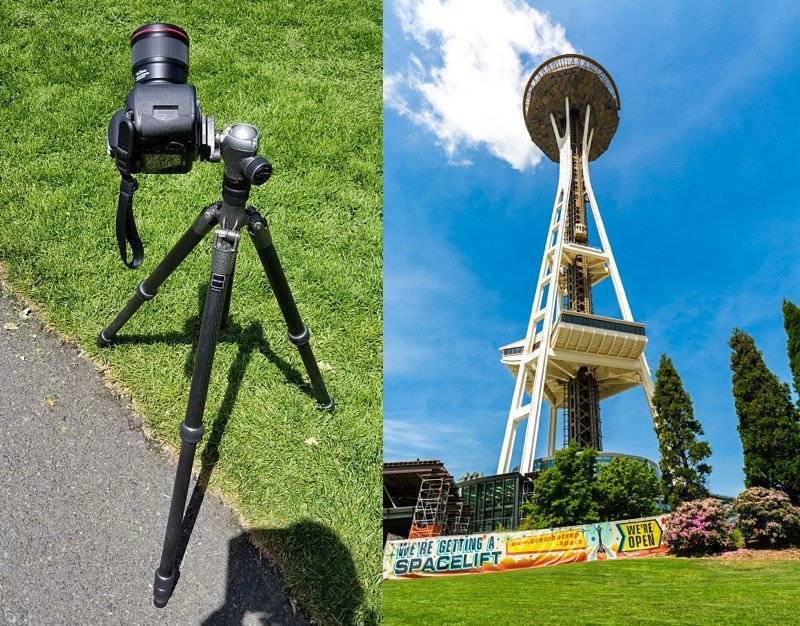
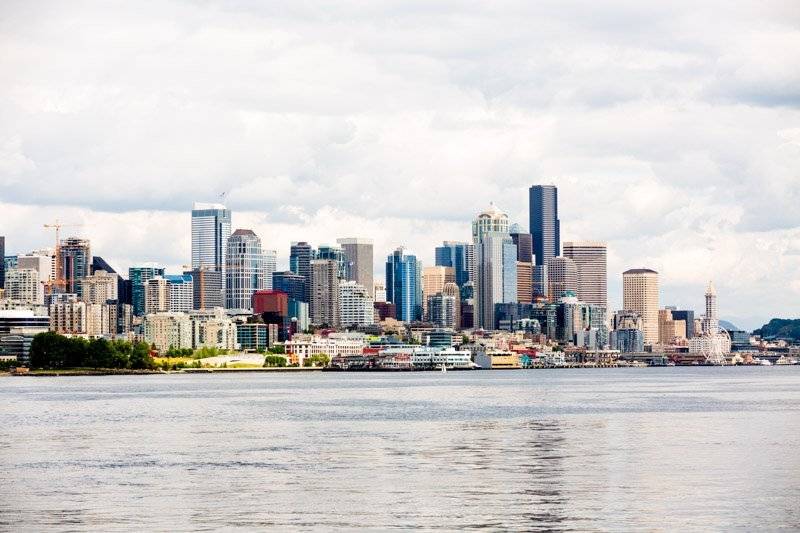
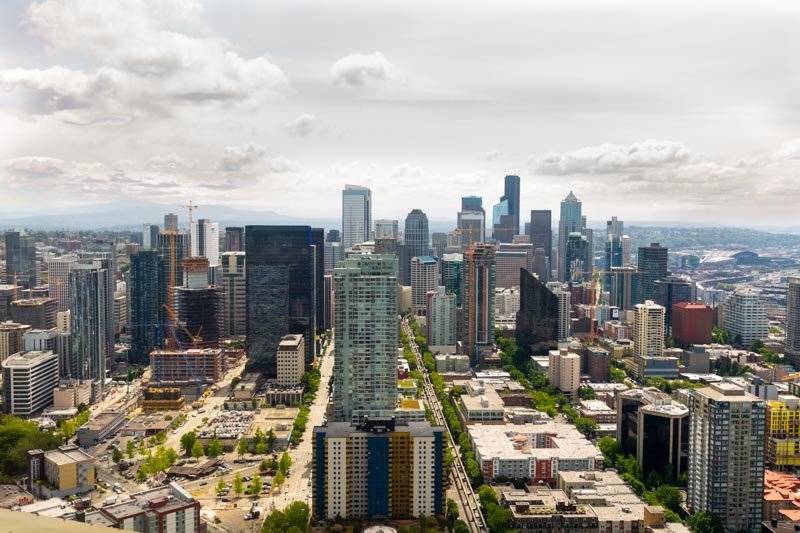
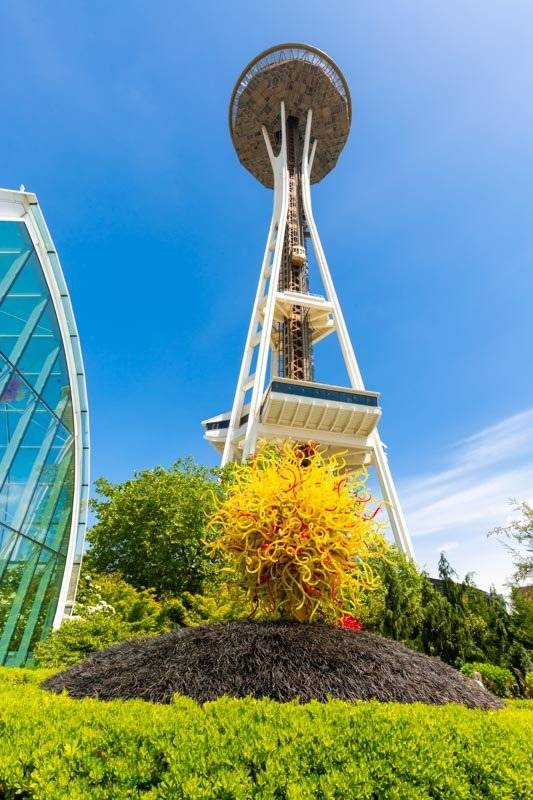
As a quick example I was able to get the entire space needle which is 606 feet (184 meters) from I’d say the distance of 1 city block!

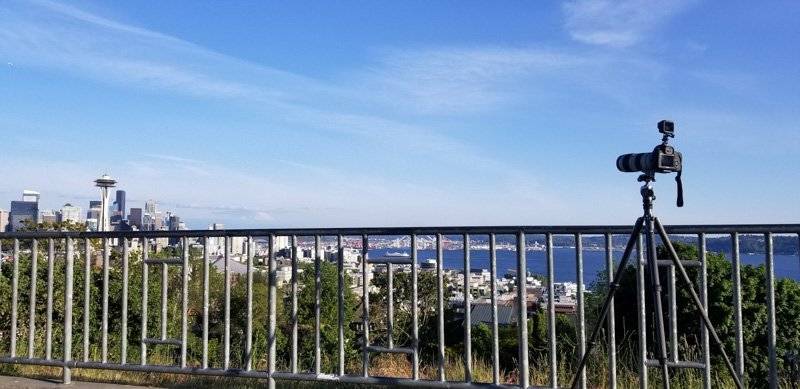
Now I struggled on deciding if I should bring my 70-200mm lens as it’s heavy. But sometimes when traveling we have to suck it up as we never know if we’ll be able to go there again.
I mainly brought it to get one shot of downtown Seattle from the vantage point of Kerry Park as it turns out to be the #1 photography spot.
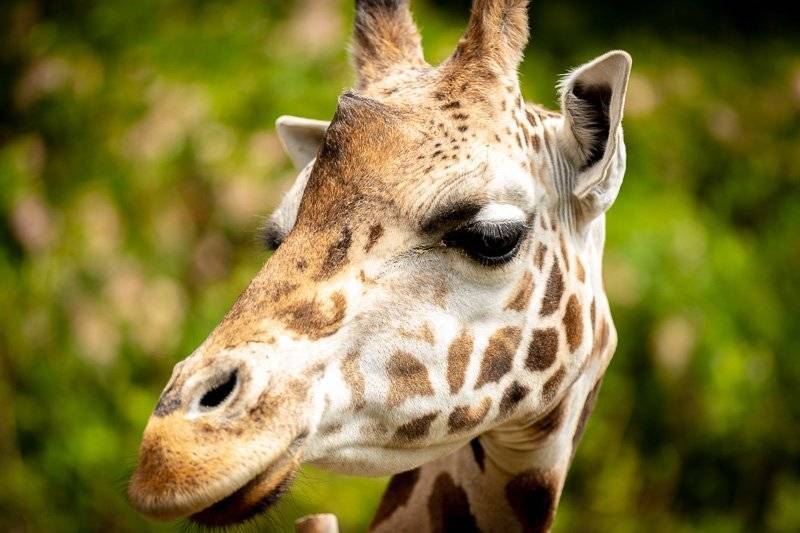
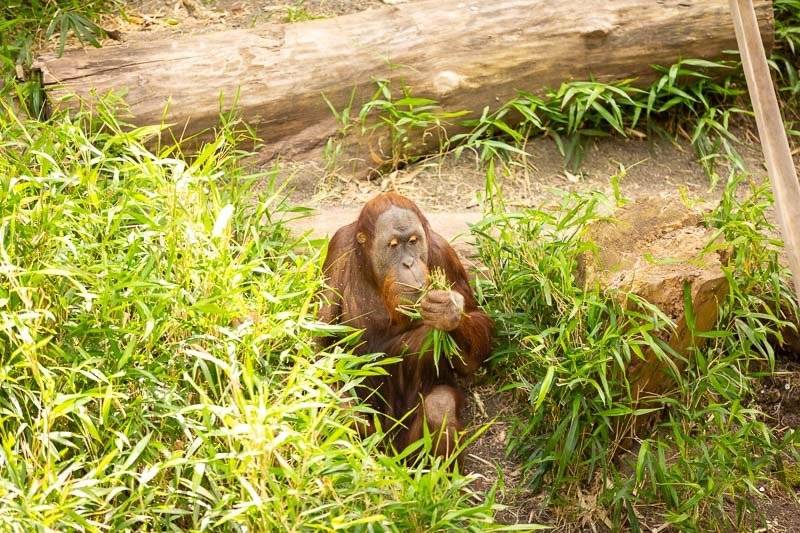
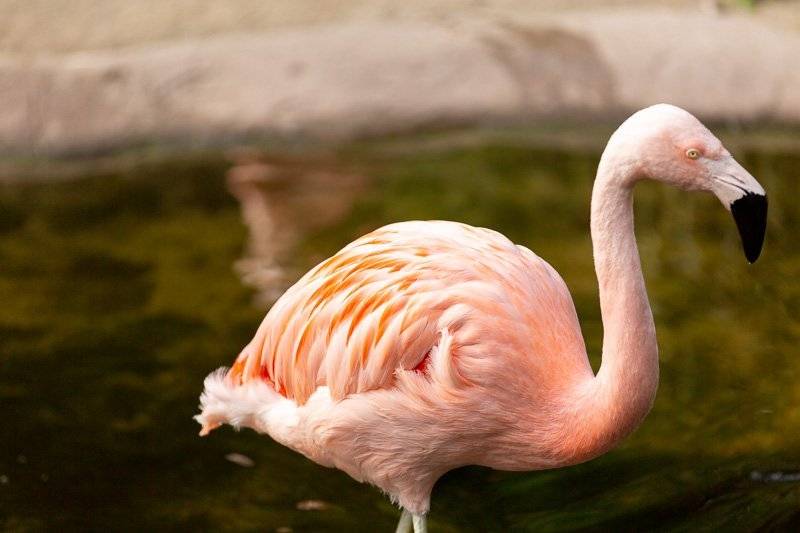
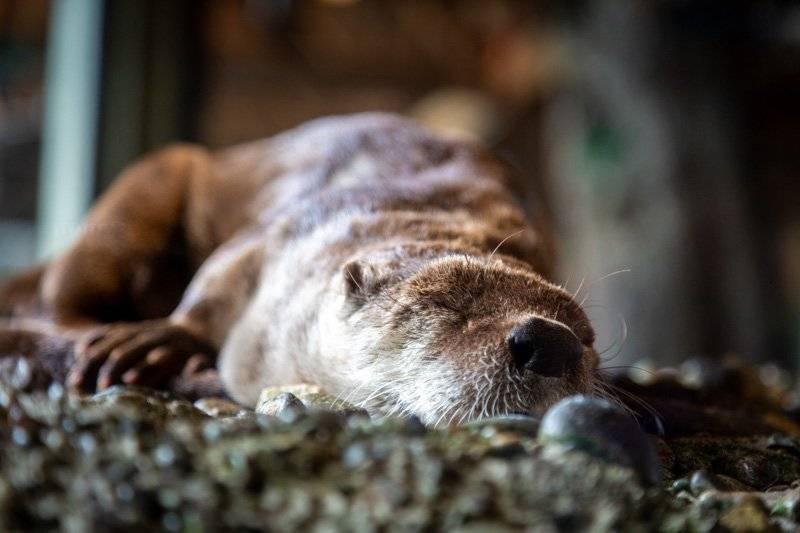
I’m also glad I brought it with me as I was able to get some closeup shots of some birds and animals over at woodland park zoo.

As for (what I though would be) my main lens I decided to bring my 24-105mm lens. The funny thing is I barely used it!
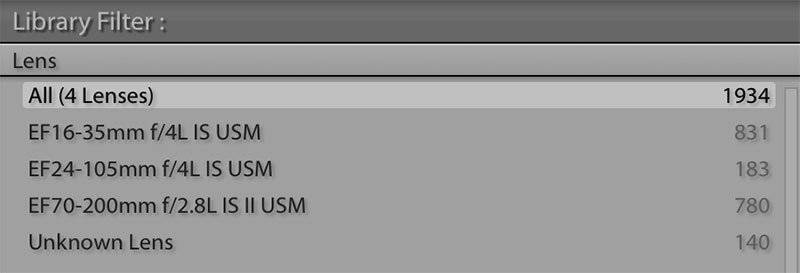
If we take a look at the breakdown - out of 1,934 pictures I shot 831 images with my 16-35mm lens, 183 with my 24-105mm and 780 photos with my 70-200mm lens.
And in case your wondering how much data I came home with on a 5 day / 4 night trip - I took a total of about 4,000 pictures and boiled down to 1,789.
That may seem like a lot - but when it comes to taking photos, never take just 1 and call it a day.
Especially when hand holding the camera and using slow shutter speeds (like in a gallery). You need to take a burst of images and hope that the middle ones come out.

And data wise (including the video footage) I came home with just under 400 gigabytes of data.
VIDEO
And speaking of video I used two GoPros. The hero 6 and 5. I considered renting a gimbal for this trip to get stabilized footage but it would have taken too much space.I filmed our entire trip but I haven't gotten around to editing the footage as the time it takes to edit just 1 video takes days. I probably have at least 10 videos I can create but that'll have to wait for now. I did however edit one so be sure to check out part 3 of my adventure.
What's great about GoPro’s is I can also mount them to my backpack and get some spy cam footage.
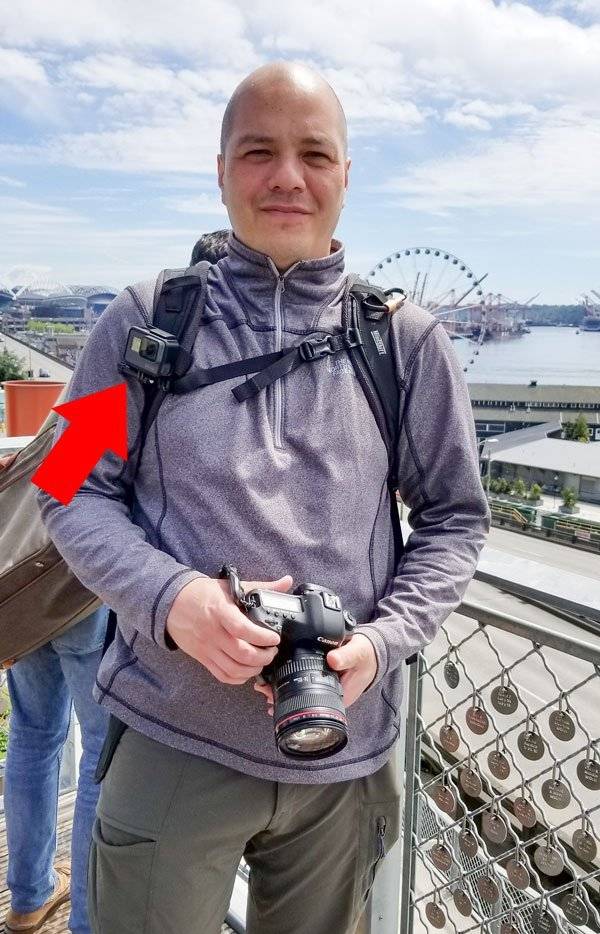
It’s a bit noticeable - but less so as opposed to wearing it on your head - lol!
OTHER ESSENTIAL GEAR
I also took with me a handy dandy portable light called a Lume Cube. I knew there were going to be situations where having a bright light will help out big time.
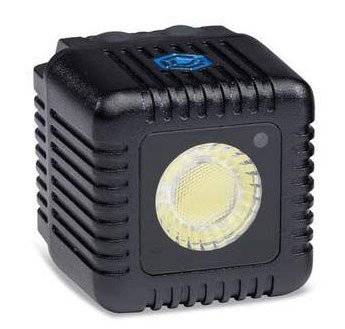
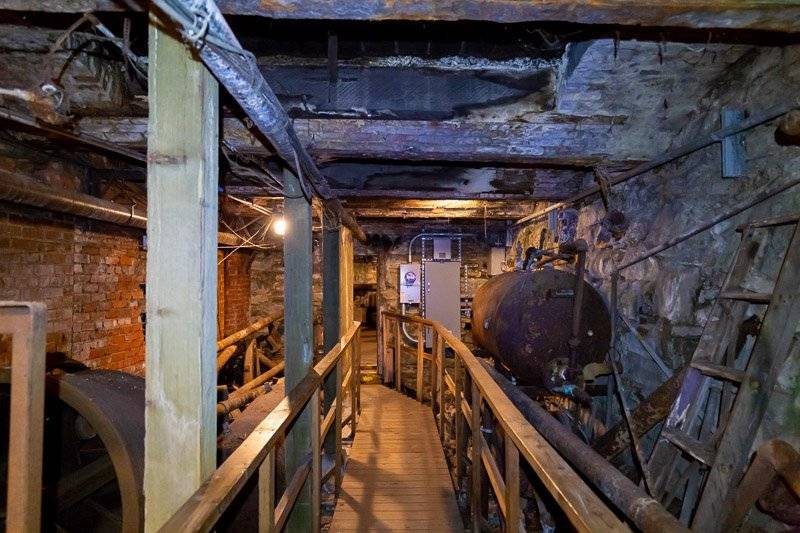
Like the time we went to check out Bill Speidel's Underground Tour. As you can imagine it was super dark down there! You can see it in action where I lit up the right side.
It’s also great because it recharges with via usb, it’s waterproof and it has 10 levels of manual brightness that maxes out at 1500 lumes - but the downside is that this sucker is pretty heavy.
Luckily for you they’ve updated to a sleeker version 2.0. Click here to see the price on Amazon. Plus now you can add gels to balance the color of light as version 1 is only daylight balanced.
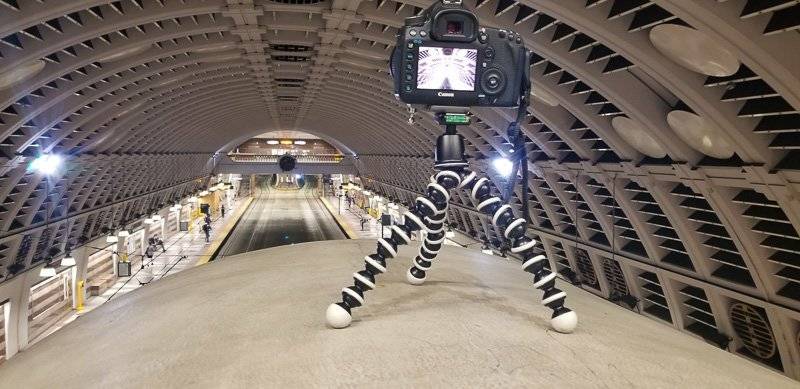
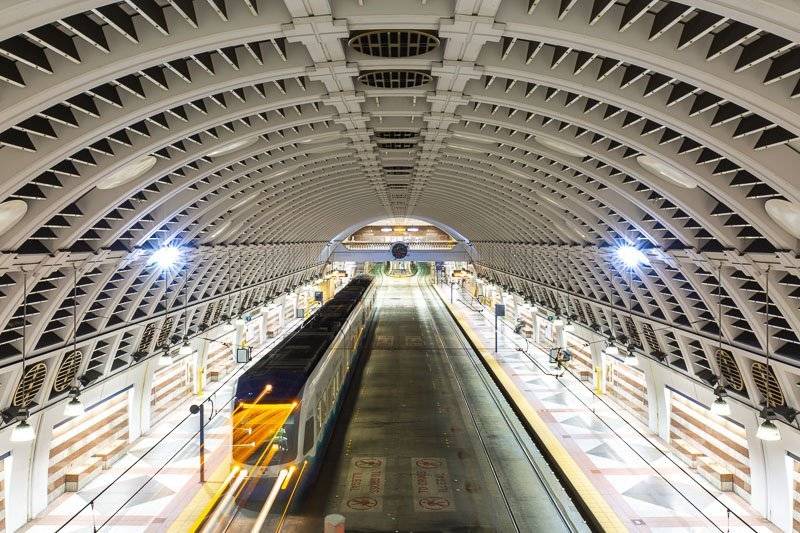
There are a lot of places where you aren’t allowed to use tripods. In situations like these I bring my GorillaPod. It’s super portable and security has never had a problem with me using it (in places where tripods aren't allowed).
I only used it a handful of times for photos but I was really happy when I was able to get this shot of the Pioneer Square Station.
I was also able to get these shots in previous outings where tripods weren’t allowed…
But it mostly got used as a tripod for my GoPro.
And speaking of tripods - I always bring my carbon fiber Gitzo Traveler series 2 tripod.
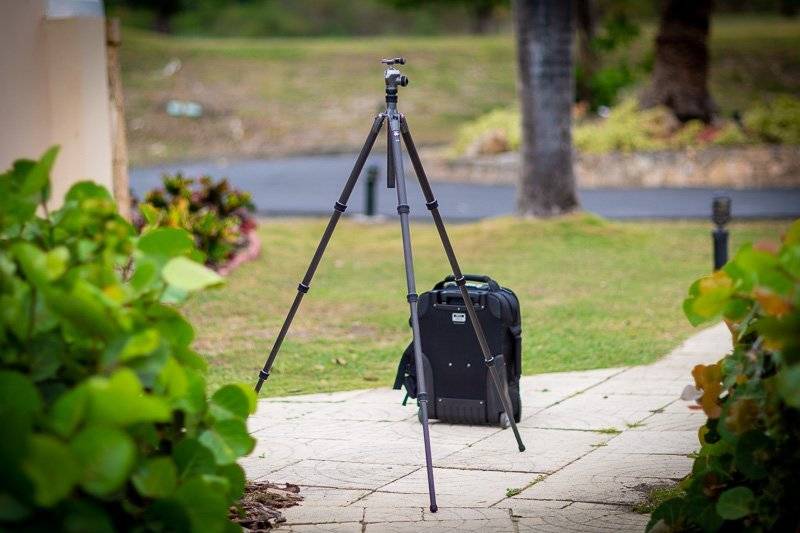
Buying expensive tripods is painful - but it's worth every penny as it's an indispensable tool. If you take care if them, it can literally last you a lifetime.
As for my laptop, it’s nothing crazy as it’s a MacBook Air that’s also traveled the world with me! Sure I’d love to have a MacBook Pro with a 15 inch screen but the charger alone would be heavy to carry.
I only need a laptop to move data from the memory cards to my hard drives. It also comes in handy if I get a call from a client that needs something. Plus if I get bored I can always start editing photos and share them on social media.
The only thing about MacBook Airs is there isn’t much hard drive space. So I bring my Lacie rugged drive.
The cool thing about these drives is that you can drop them from I believe 6 feet and even run over them with a car and they’ll survive! These suckers are simply bulletproof.
On destination weddings I’ll take 2 hard drives to have 2 backups. But for this trip I opted to only bring 1.
PLANNING THE TRIP
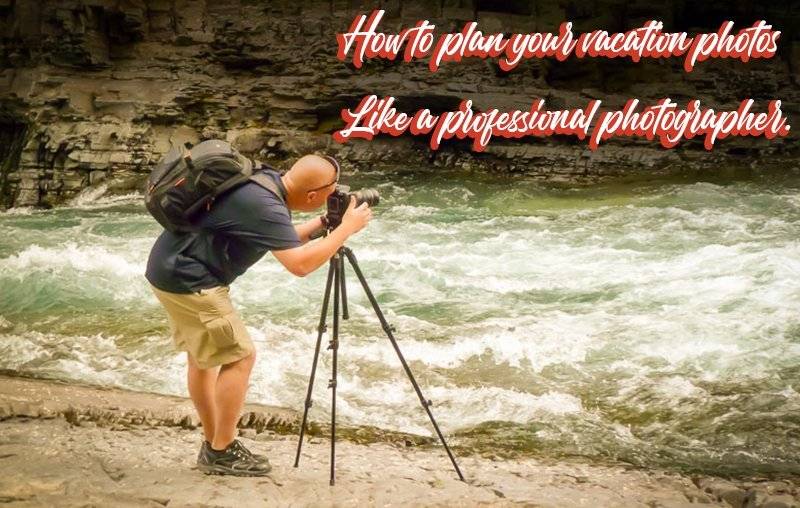
Now before I embark on any journey I always plan ahead of time. If you’d like to see how a professional photographer plans their trips to get amazing photos, I highly suggest you click on the image below to read exactly how I planned this trip…
WALK WITH ME
So now you know how I planned my trip and exactly the gear I used to capture stunning photos and videos!
Part 2: Pike Place Public Market, Seattle Aquarium, & Argosy Harbor Cruise.
Welcome to part 2 where I give you a review of the Pike Place Public Market, the Seattle Aquarium, and I'll tell you why I'm glad I brought my long lens for the Argosy Harbor Cruise.
Now the first day was a long one!
Our flight was scheduled to leave Boston Logan airport at 6:30am, which meant we had to be up at 3:30am. And if you know me, I always wait until the last minute to pack.
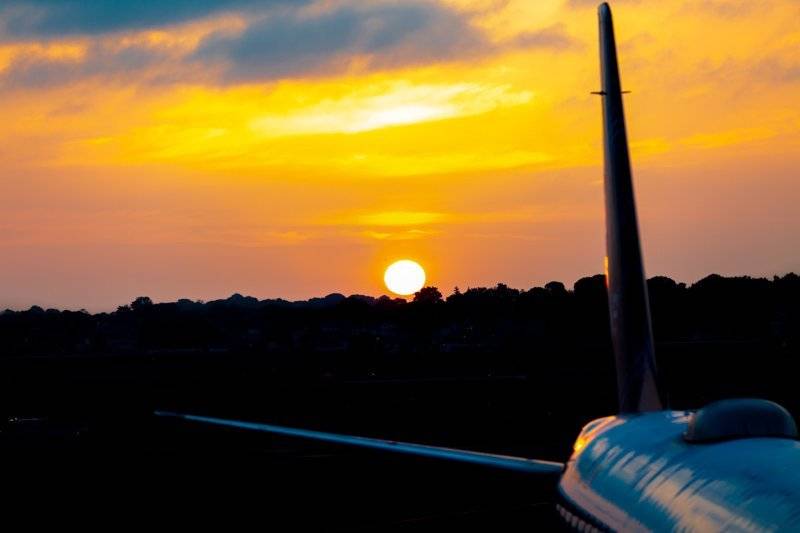
But I knew I was able to stay up late as we were fortunate to fly in Jet Blue’s first class service they call “Mint”. I didn’t get to enjoy all of the amenities as the seats lay down almost completely flat which meant I slept the entire 6 hour flight.
One cool thing (and I'm not sure if other airlines do this) is that you’ll get your luggage before other people. This is awesome as sometimes waiting for your luggage can be time consuming and after a long flight you just want to get to your destination.
We decided not to rent a car and used Lyft to get around town. Since we were staying in downtown Seattle everything is walking distance, or either close to public transportation.
Being a passenger for a change gave me opportunities to take photos while on the move!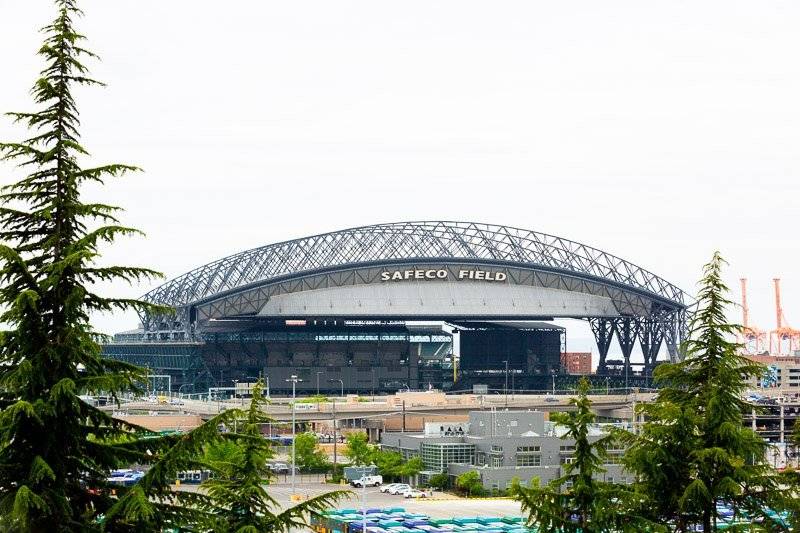
Plus parking at the hotel was something crazy like 50$ a day so we figured we’d troop everything. And for the record I didn’t miss having a car - until we got to Kerry Park (which I’ll get into later).
After dropping our luggage off, we were starving! So what’s one to do while staying in downtown Seattle?
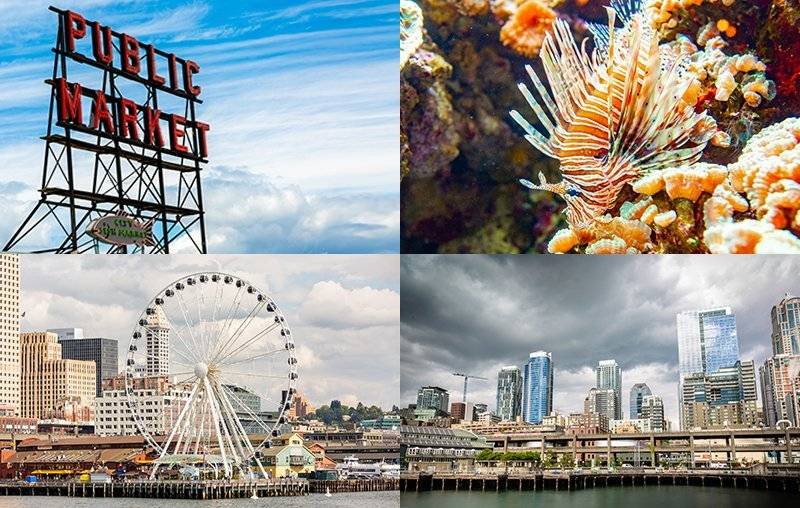
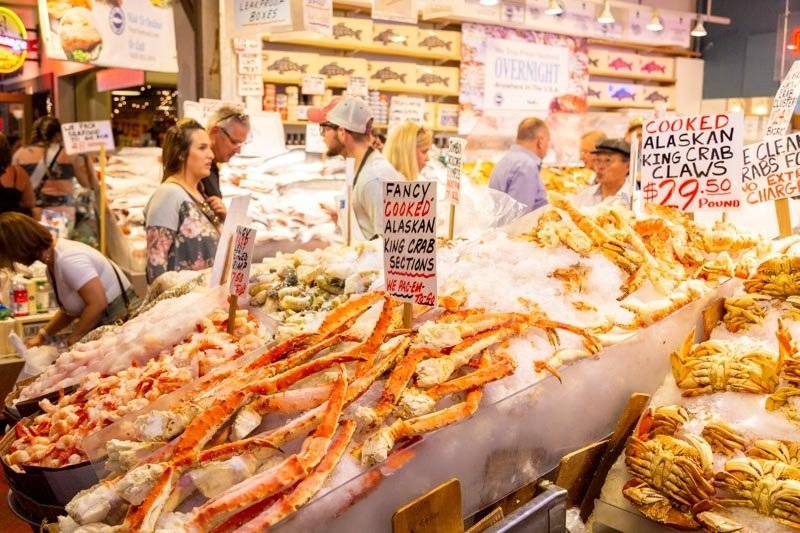
PIKE PLACE PUBLIC MARKET IS THE PLACE TO EAT
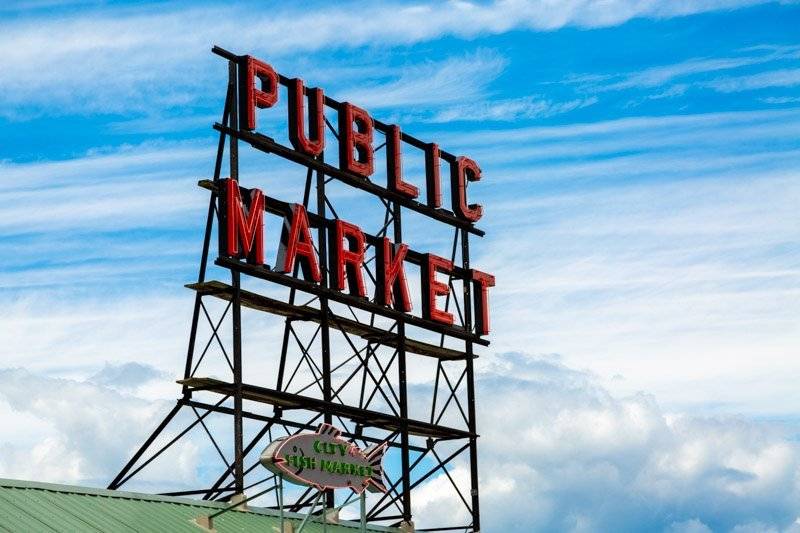
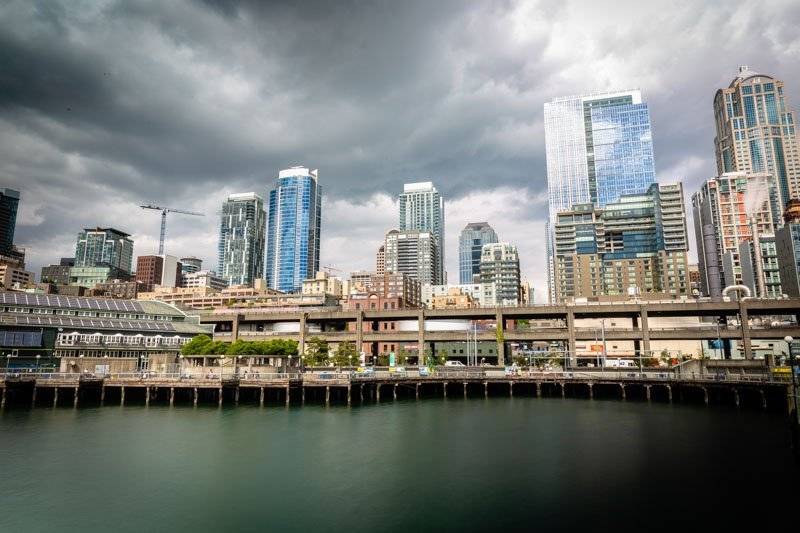
Read or watch any travel documentary and you’ll see Pike Place is at the top of the list. Pike Place is a public market located right by the water on Elliott Bay.
You’ve probably seen people over at the fish market throwing fish. It’s kind of gimmicky but people really go crazy overt it. Check out the video clip below...
If you love seafood - you've come to the right place!
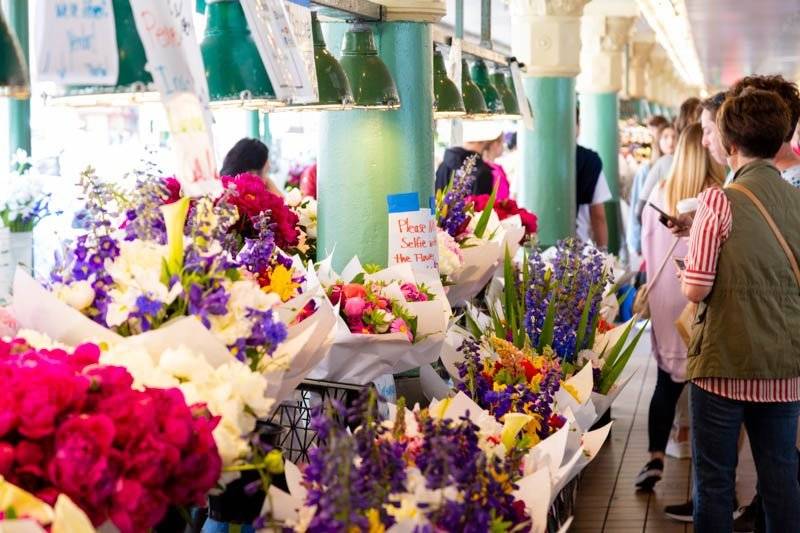
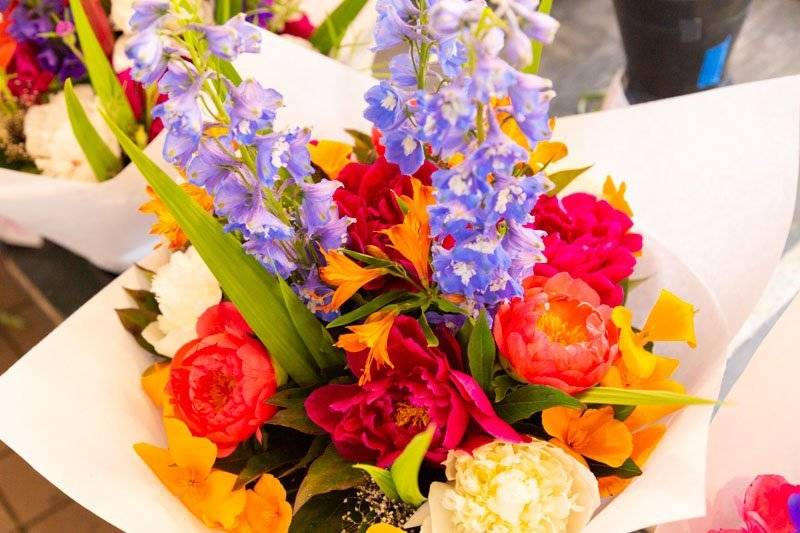
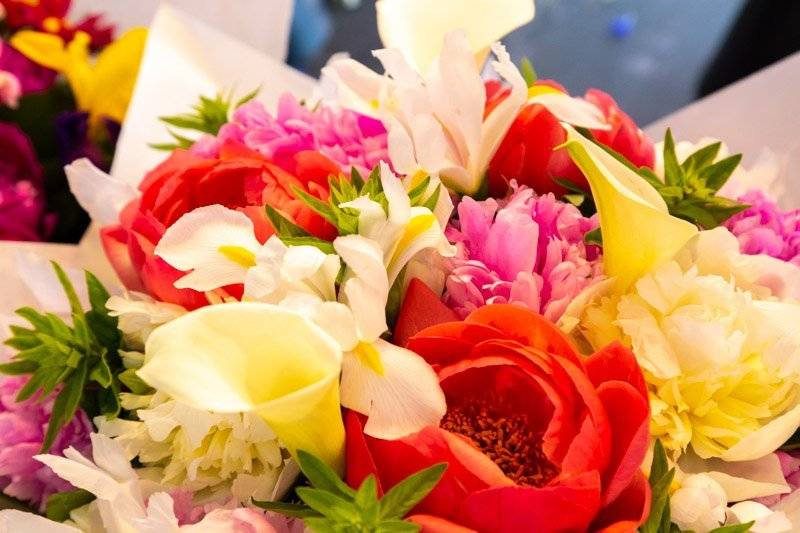
Aside from the countless food options, you can find some of the most beautiful flowers you've ever seen! The crazy thing is, they’re not even expensive.
Bouquets cost no more than 20 dollars and in NYC these same flowers would probably go for 80 bucks!
You’ll also find a lot of touristy gift shops if that’s your thing.
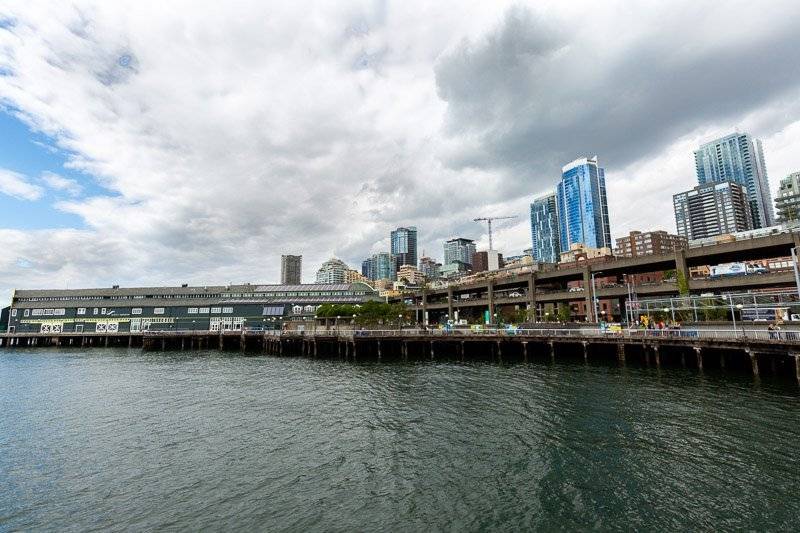
We didn’t have an exact plan for today, but we knew some of the locations we wanted to visit were in that general area. We noticed that the Seattle Aquarium was about a 10 minute walk so we figured why not?
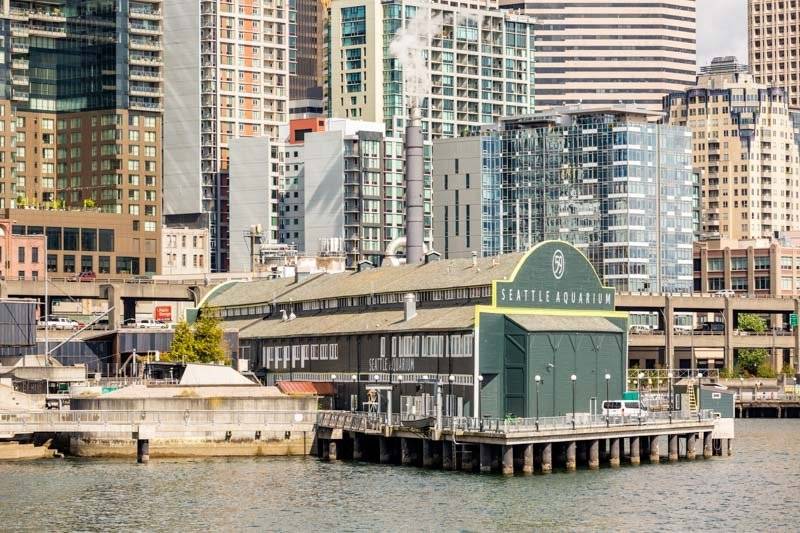
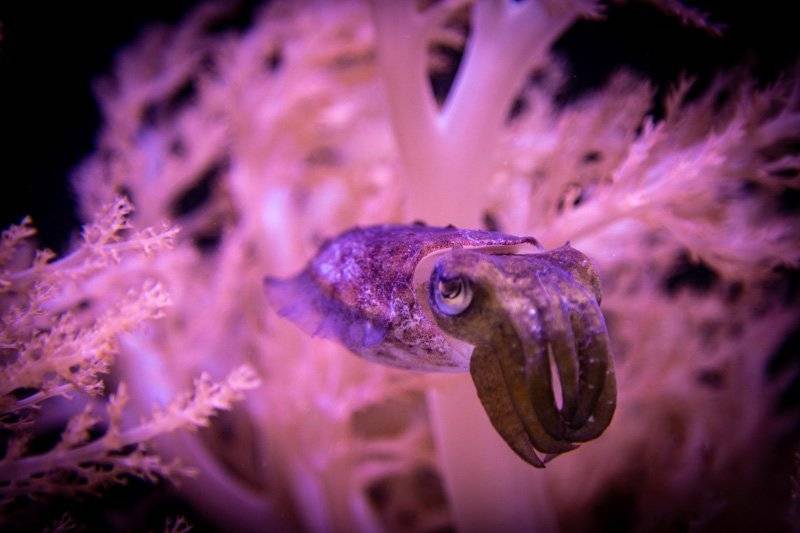
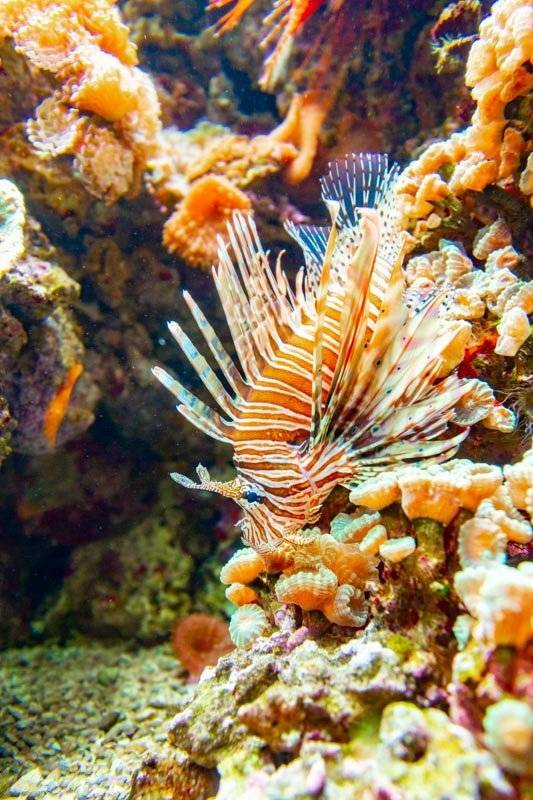
THE SEATTLE AQUARIUM
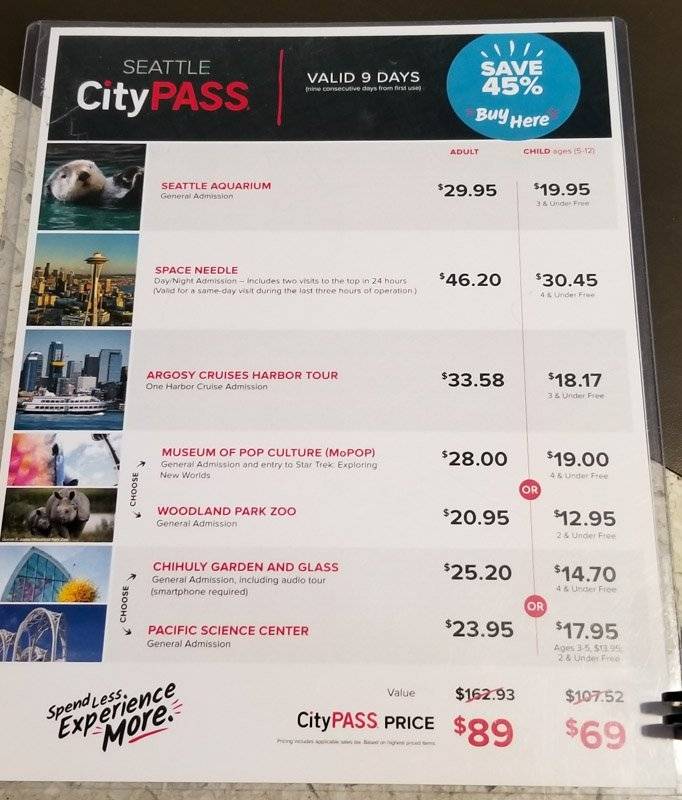
When I was at the register I paid $60 bucks for 2 tickets. But when I looked up I saw that they offer a CityPASS which included several of the spots we wanted to check out, so I ended up purchasing it as it was a good deal.
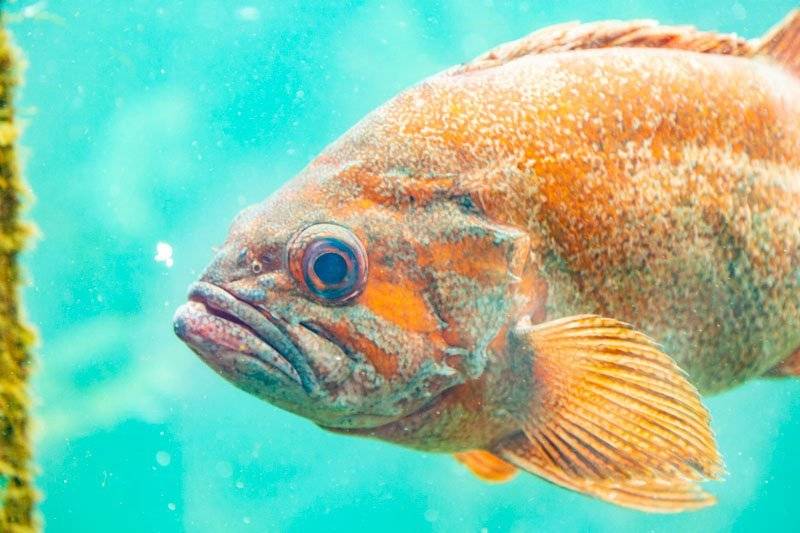
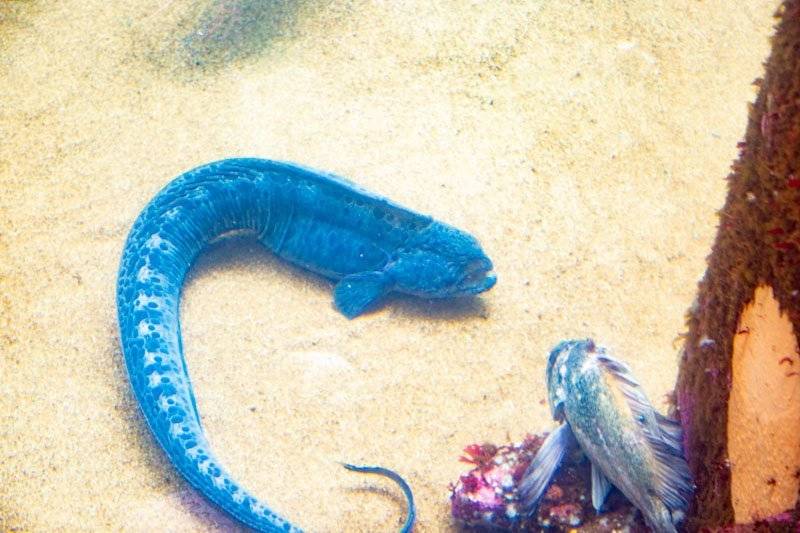
The aquarium looked small from the outside and they did a great job maximizing the space. I didn’t take many photos as I was more focused on capturing videos.
And it’s funny, during our trip the things I was really looking forward to turned out to be underwhelming - and the things that I had low expectations really blew me away. And one of those things was...
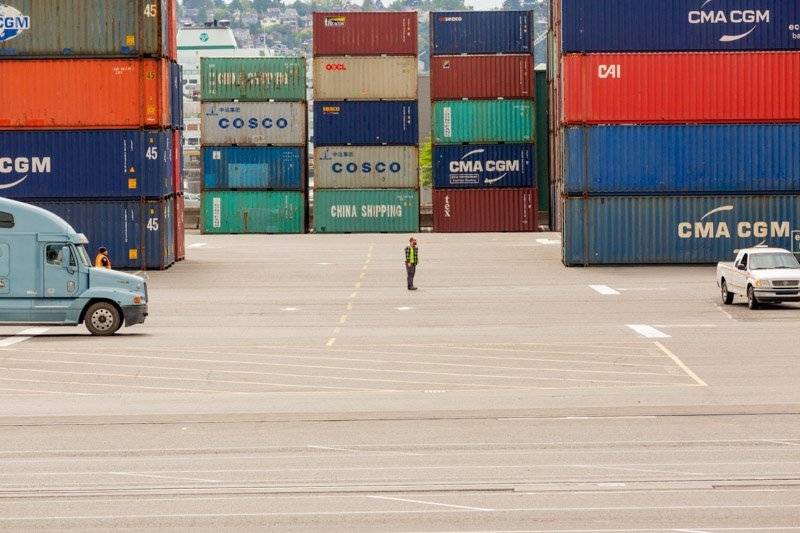
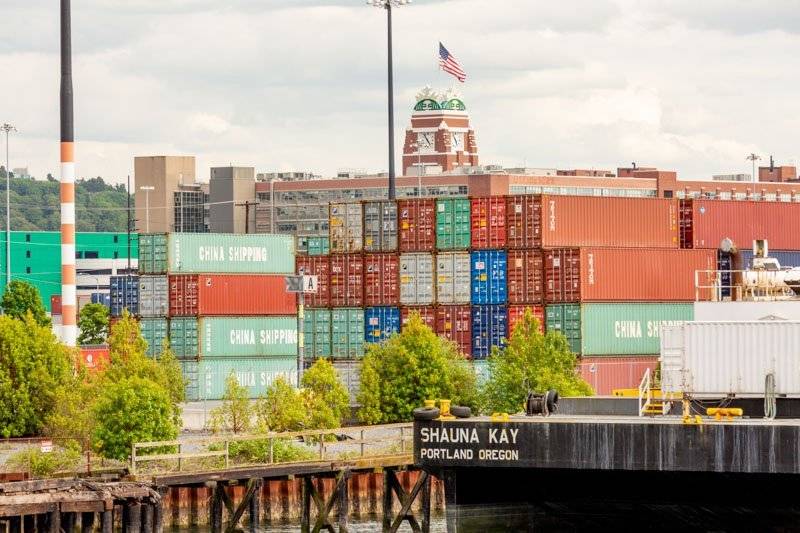
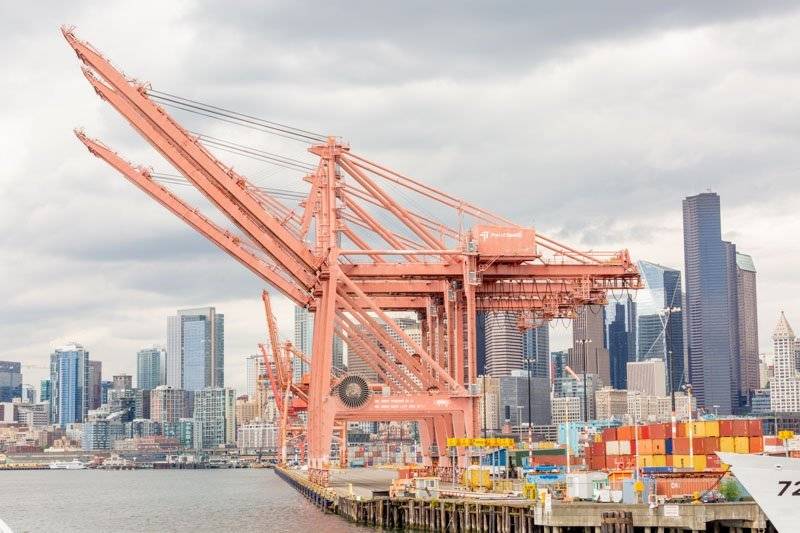
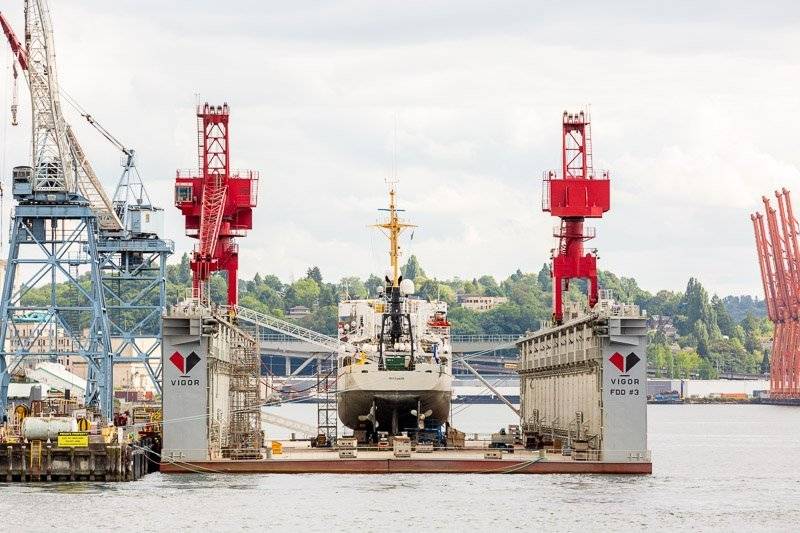
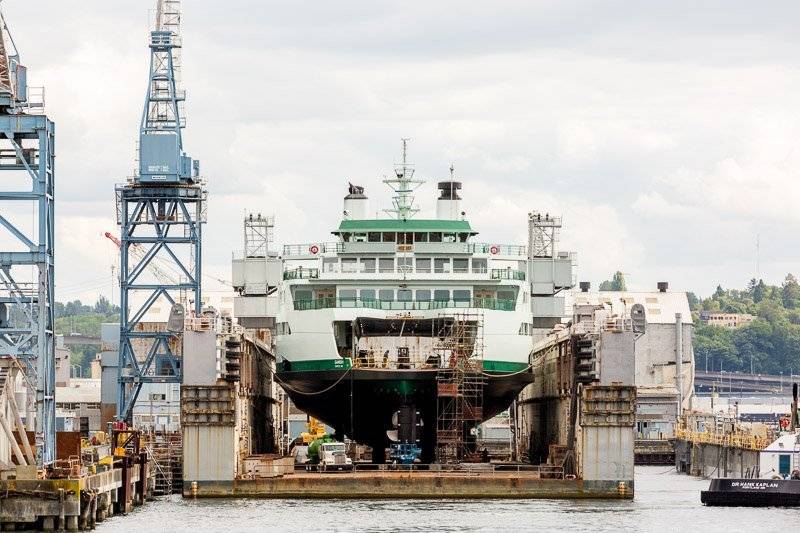
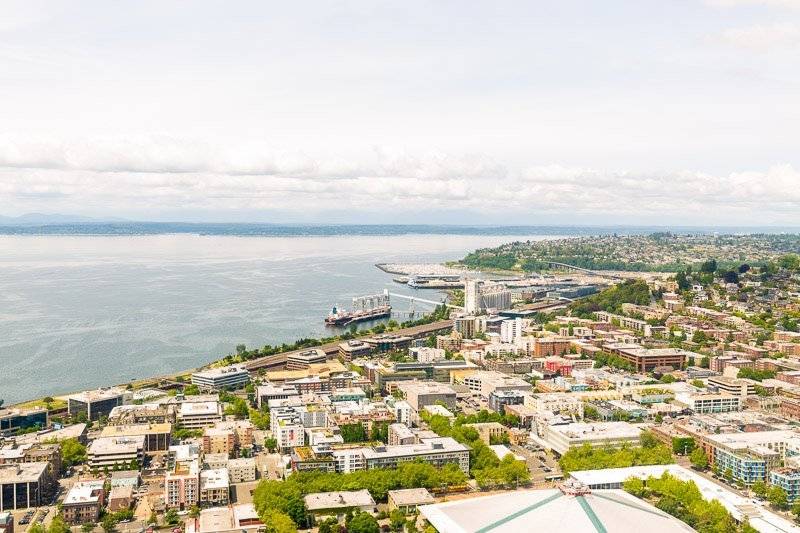
ARGOSY HARBOR CRUISES HARBOR TOUR
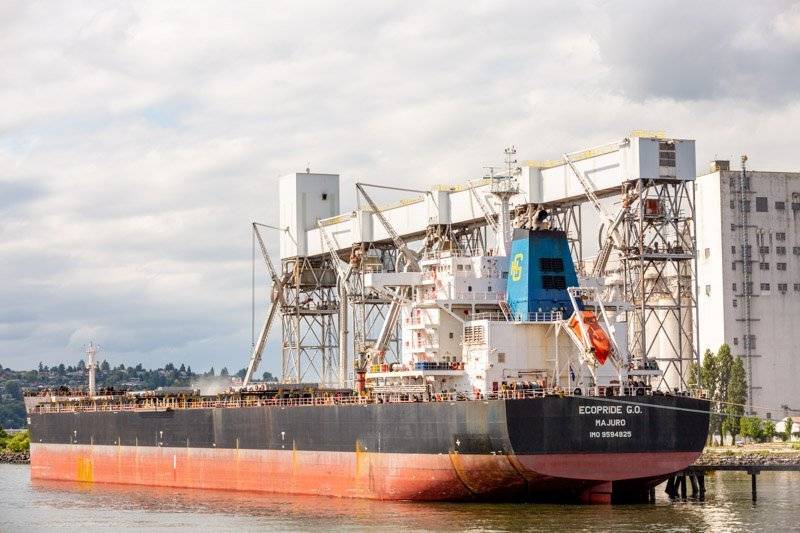
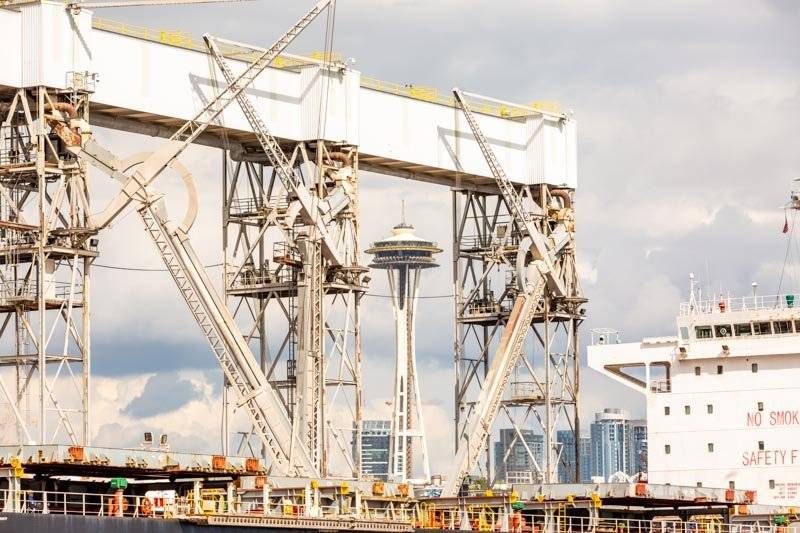
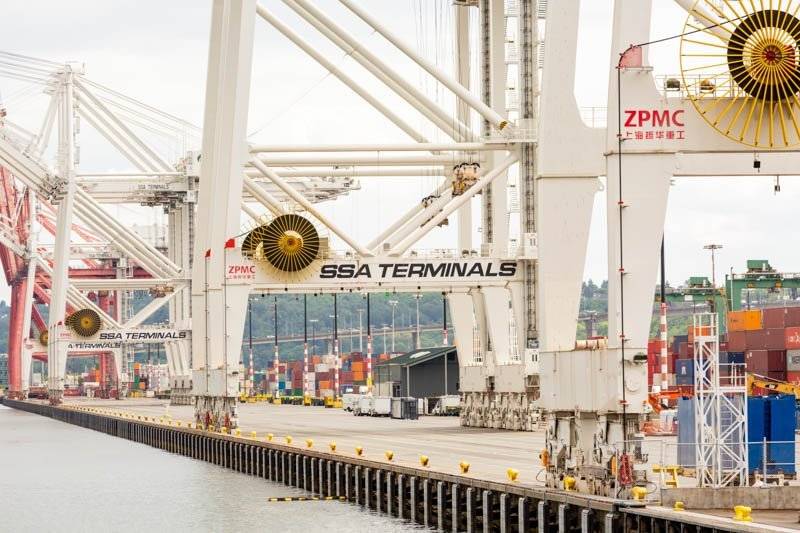
If we didn’t purchase a CityPASS I would have never gone (especially not for $34). But I’m glad we did! I was also glad I had my long 70-200mm lens as I was able to get nice shots from the boat.
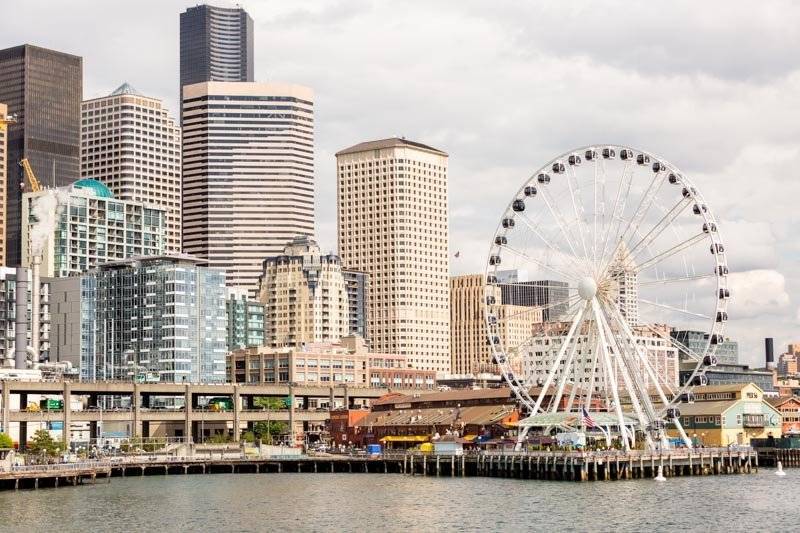
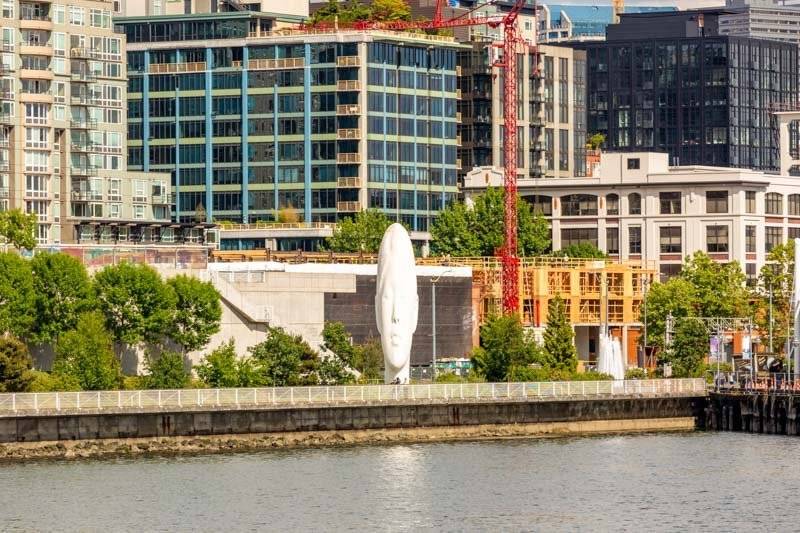
I don’t know why, buy I really enjoyed seeing the massive gantry cranes, dry docks and shipping containers. I guess it’s because it’s something you don’t see everyday and these things were huge!
After the cruise I took a long exposure of the bay. I didn’t bring my Lee Filter system as it would have taken too much space, but I did bring my Sing Ray Variable 8 stop neutral density filter.
I’m sure I’m speaking Greek right now (lol) but what an ND filter allows me to do is shoot a long exposure in the day to get shots like this…
Verses a “regular shot” like this…
Notice the effect ND filters have on water. It takes a while to setup the shot but it’s worth it. And speaking of "taking a while to setup"…
TRAVELING WITH PEOPLE IS ALWAYS A BALANCING ACT
When traveling with my wife, it’s always a balance of spending time with her verses taking photos. Over time I’ve gotten better as when you become a pro - you know if it’s worth “taking the time to get the shot”.
I have to pick my battles but it’s worth it in the end. I’ll write a separate blog post in the future, but let’s just say it was during this exact shot...
...that I learned I’m always better off venturing out by myself to take photos.
I don’t think we ate anything else that night as we covered a lot of ground on our first day and we were beat. Plus factor in the 3 hour difference and it was time to hit the sheets!
Part 3: Space Needle, Chihuly Garden & Glass, Kerry Park and more!
Welcome to part 3 of my Seattle review as I'll be reviewing the Space Needle, Chihuly's Gardens and Glass gallery, and I'll reveal where the best photo spot in Seattle is (spoiler alert) Kerry Park. Now if you’re reading this on a mobile device, I advise you to put your wifi on as this is going to be a monster post!
THE SPACE NEEDLE
Now it’s day two and we hit the ground running once again!
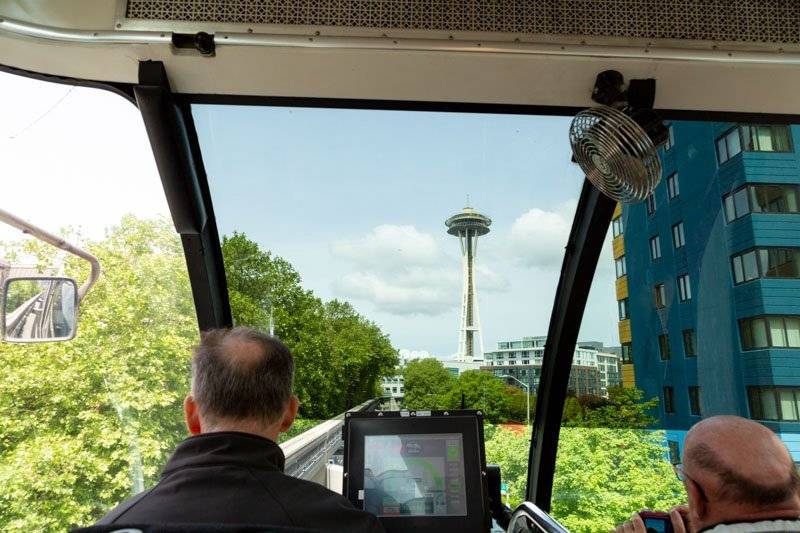
Our first stop was to the Seattle Center we decided to take the monorail because, well why not? For those curious the fare costs $2.50.
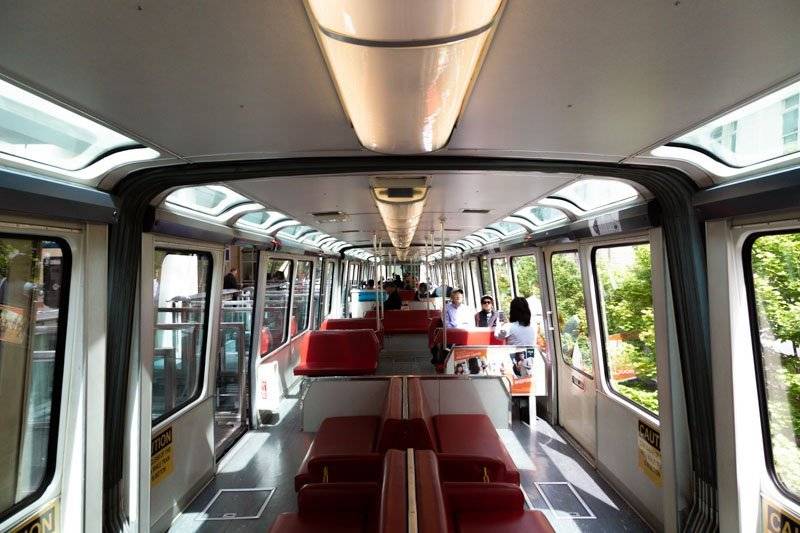
Once you get off the last stop you’ll see Seattle’s most iconic landmark and that’s the Space Needle.
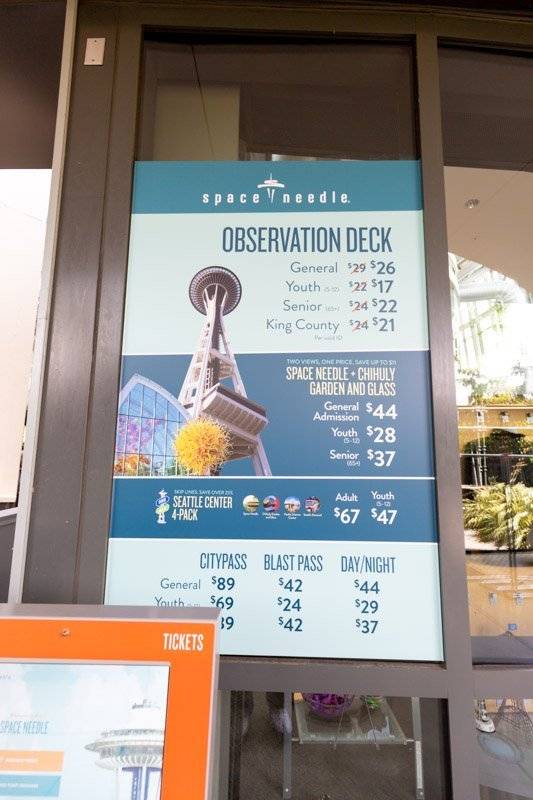
If you're wondering what the cost of admission is, here you go...
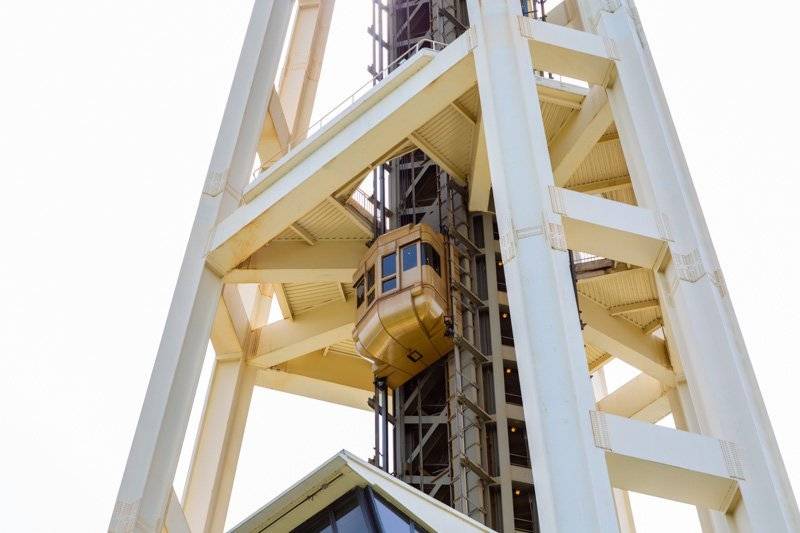
And for those of you that have played Bioshock - tell me the elevator doesn't look like something out of the game!
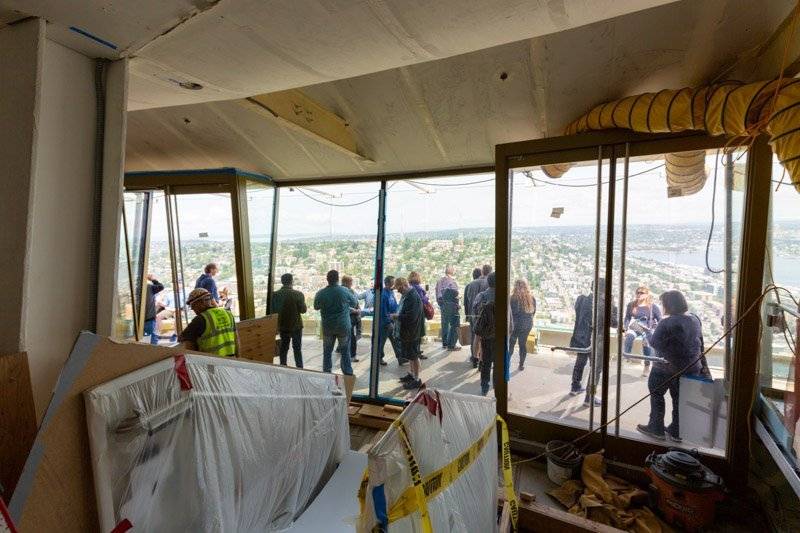
I was super exited to get up to the top as I love, love, love shooting from high vantage points, but to be honest it was was a bit underwhelming.
I can’t pinpoint why. Perhaps it’s the fact that I’m from NYC and it takes a lot to impress me. The construction was also a factor as I we weren’t able to to completely walk around - so I felt a bit gypped.
While my wife was at the gift shop, I took the time to setup my tripod so we can take a photo of us. Why did I mention this? Well, the quality of cellphone pictures isn't great - at least when it comes to printing photos large for our living room.
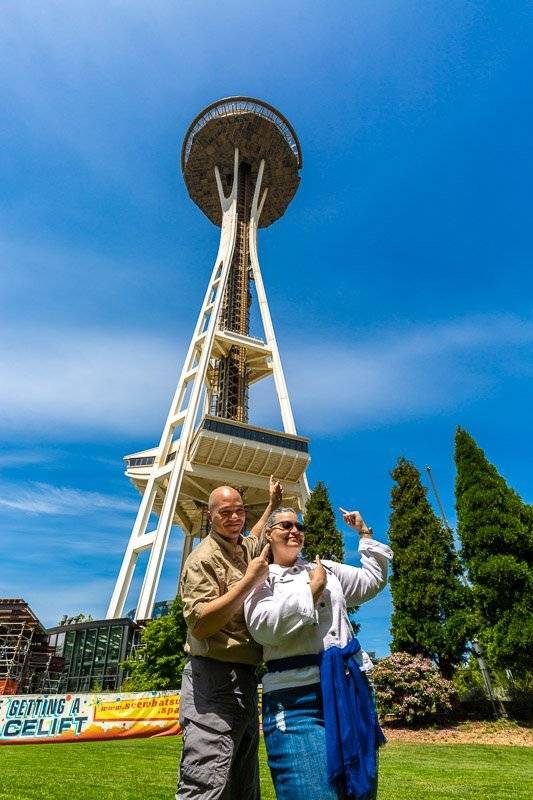
When it comes to special places, I'll always take at least a photo or two with my "real" camera. And if you're ever looking for a destination photographer for your next vacation - don't hesitate to reach out!
The problem photographers face is not being in the vacation photos. So one thing I do for the best quality photos is to use my tripod so I can be in some of the photos.
https://vimeo.com/showcase/5247123/video/269006601SHOOTING SUNSTARS
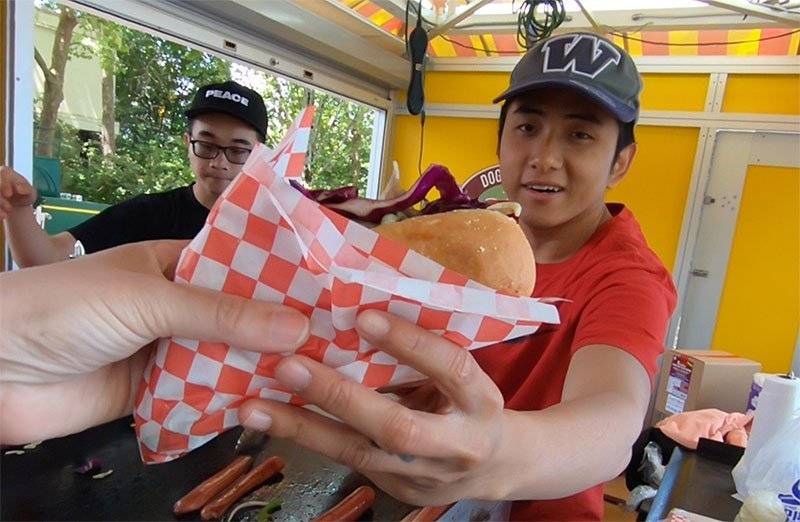
Afterwards we decided to visit Chihuly’s art installation as it was in the area. My wife heard about a “must eat” food to eat while out there and that’s a Seattle-style hot dog. When in Rome right?
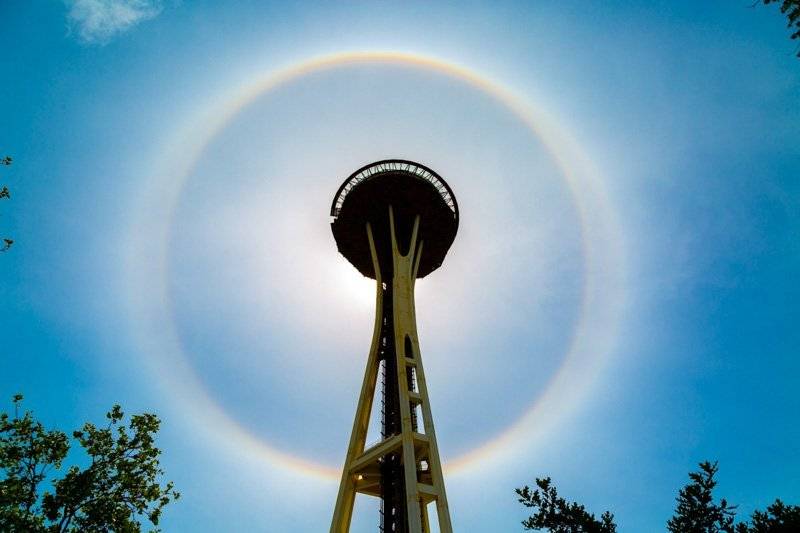
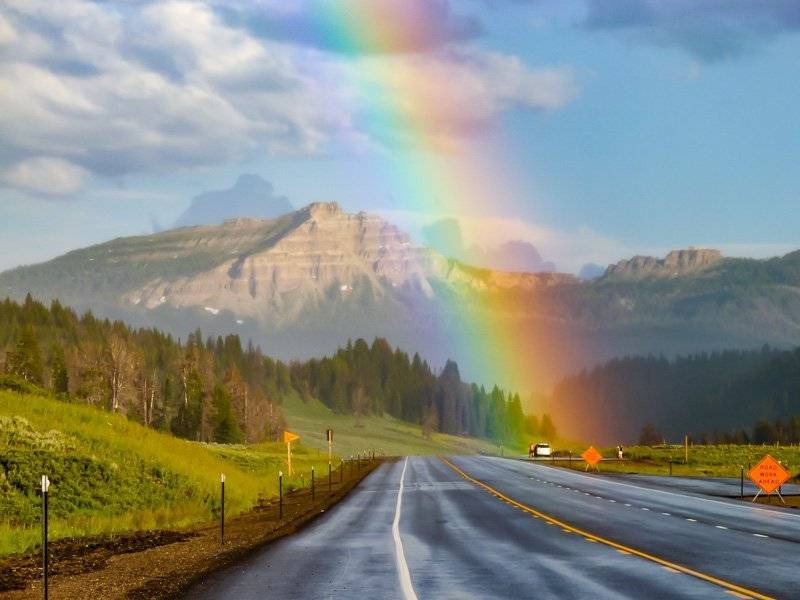
While she was off waiting for her food, I figured I might was well take some shots of the Space Needle. And much to my surprise there was a rainbow around the space needle!
The other crazy thing was that I remembered how to shoot sunstars! I actually forgot about the technique and if you’re wondering what I’m talking about check out this video…
https://vimeo.com/showcase/5247123/video/294481187CHIHULY GARDENS & GLASS GALLERY
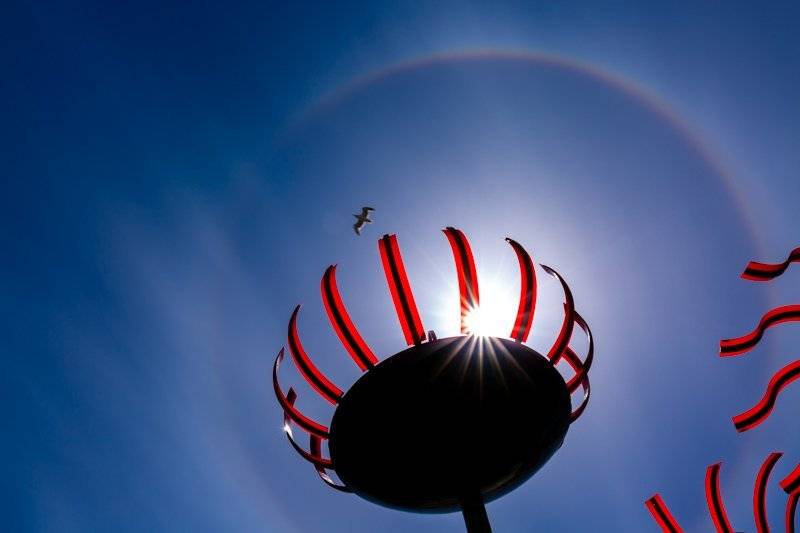
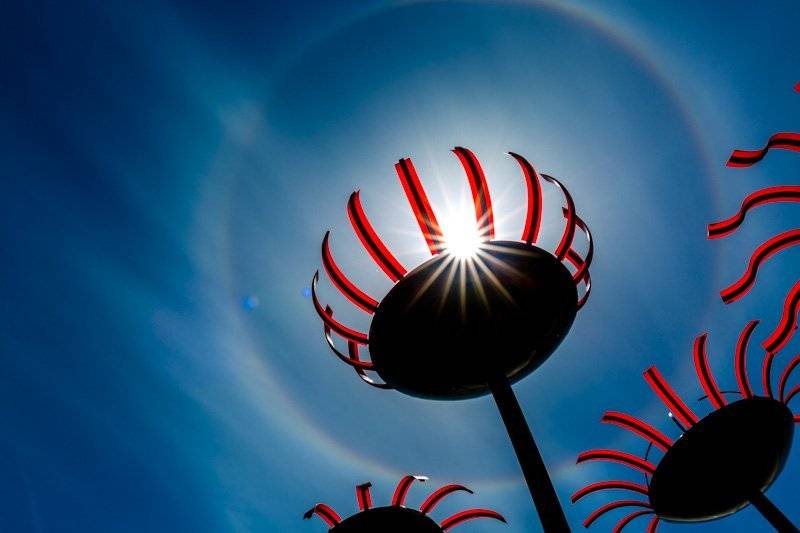
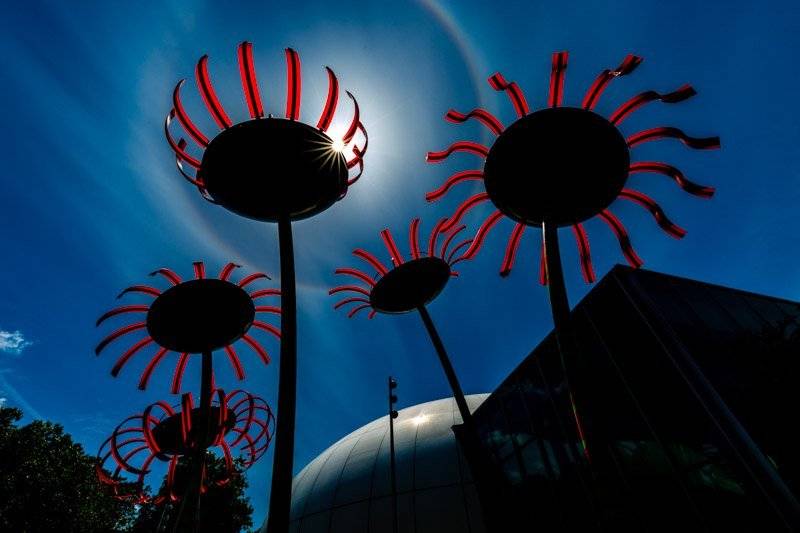
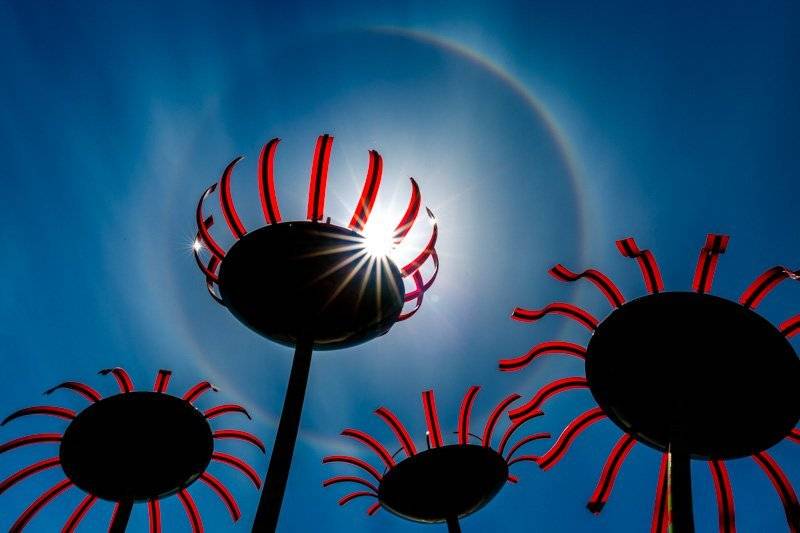
Our next stop was the Chihuly Garden’s and Glass Gallery. But before we went in - I noticed these flowers so you know I had to stop!
Since the rainbow was still in the sky, I figured why not shoot the flowers as a silhouette, while having the rainbow in the background.
And just as luck would have it a bird flew by and I was able to capture it on film and video! These series of shots was some of my favorites as they came out really well!
Now the Chihuly gallery was something I wasn’t ready for as it was freaking amazing! I had to leave my tripod behind as they’re nervous about people bumping into the fragile glass - and I don’t blame them as people like me can be very clumsy!

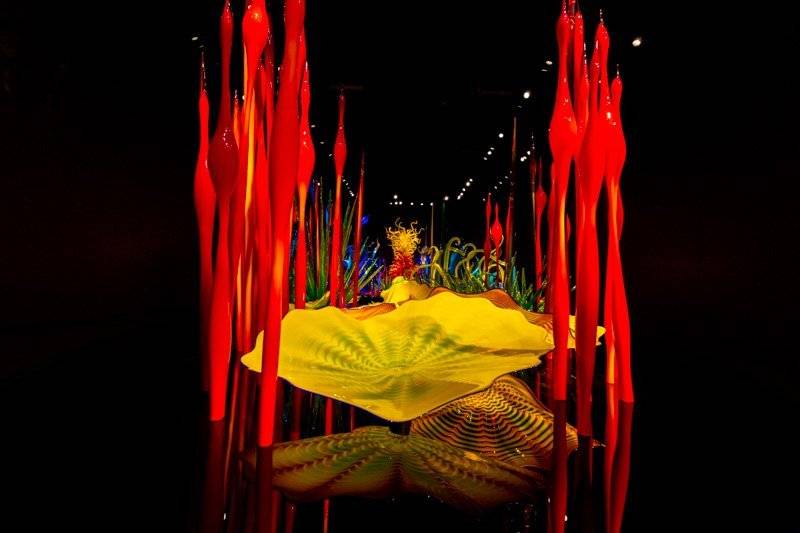
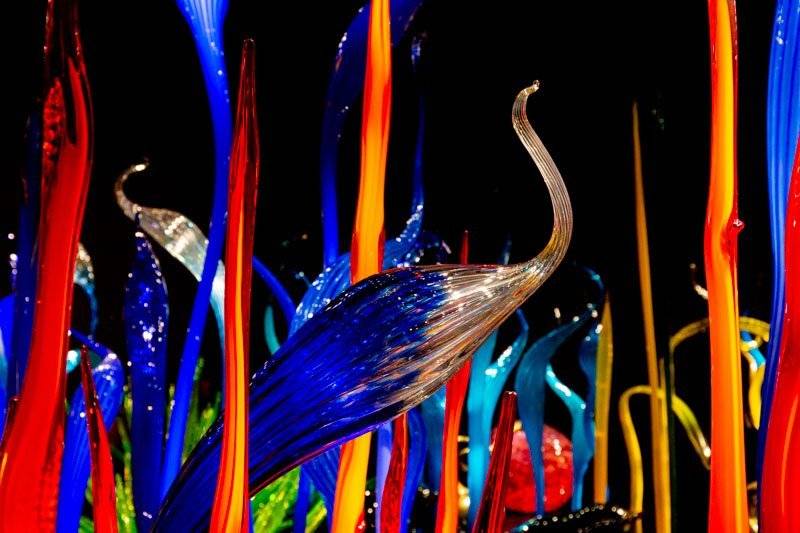
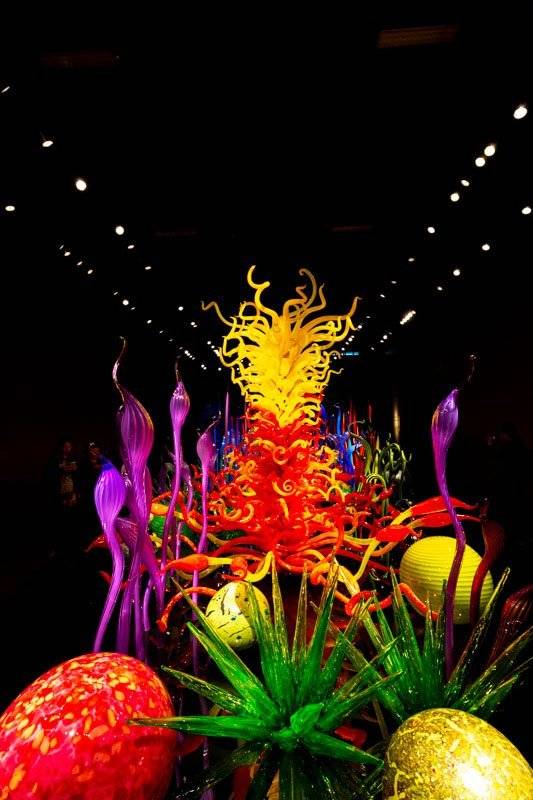
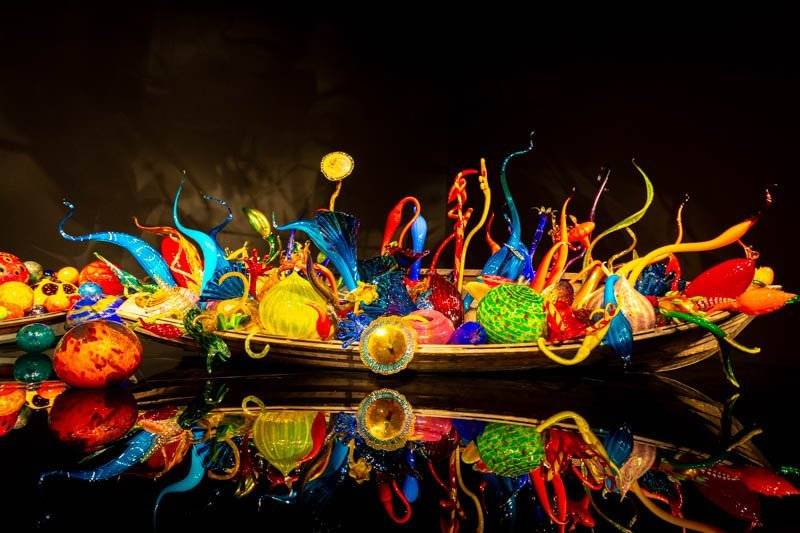
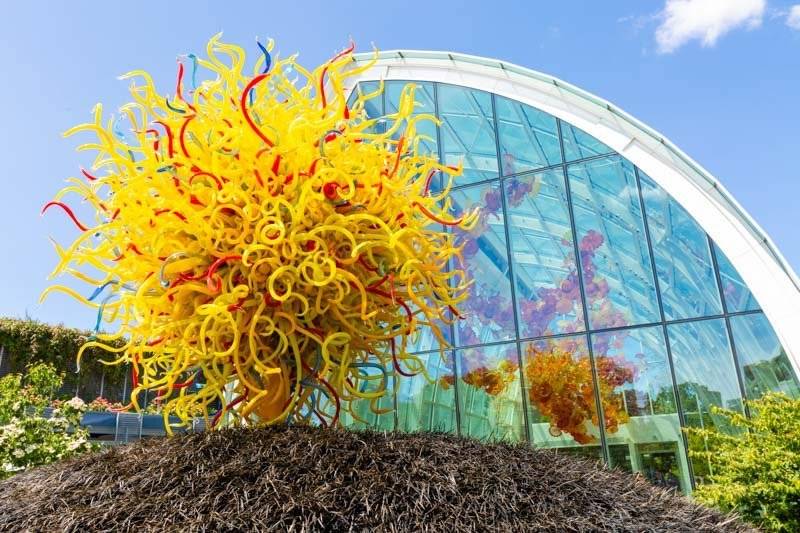
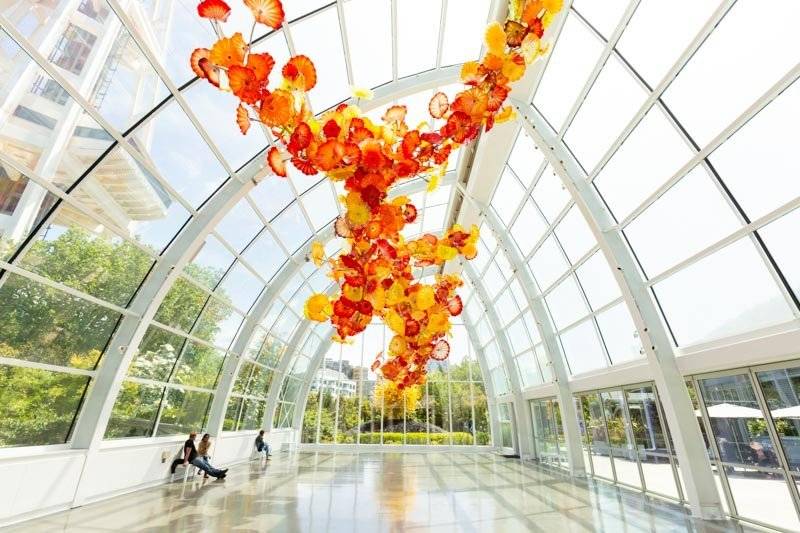
Now as for my thoughts on the gallery - I’m really at a loss of words! I had zero interest in going, but after being there for 5 minutes I was glad we did!
FREMONT TROLL
We then jumped over on a Lyft and headed north to check out the Fremont Troll. It’s under a bridge and I wasn’t very happy as it was super dusty and dirty. And to make matters worse - I was wearing white sneakers.
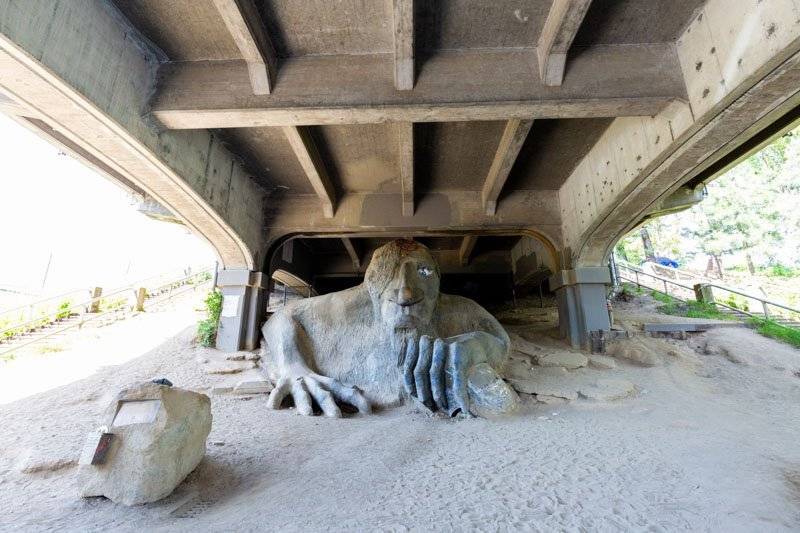
Aside from wearing white sneakers - I don’t like to get my gear dirty with dust as dust is no bueno for camera equipment.
As a side note when images are "boring" try making a black and white version to add drama...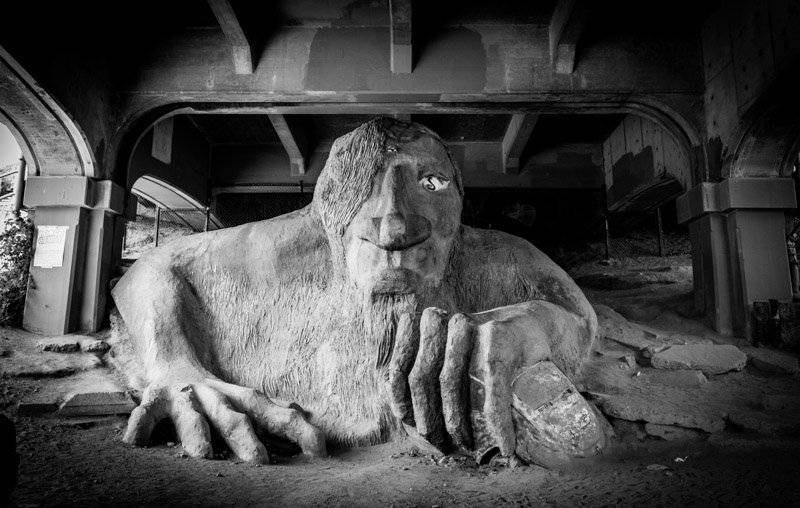
EDMUNDS WASHINGTON
If you're wondering what in the world I was doing in Edmunds Washington - it was for two reasons...Reason 1: Eat poke over at Ono Poke. I can't recommend them highly enough as you'll be hard pressed to find better authentic Hawaiian Poke!
To this day I still daydream about their food as it was de-li-cious! If we lived in the area - the staff over there would know us by first name!
Reason 2: Check out Aquarium Co-Op. Being a fishkeeper I've always found Corey's videos informative and inspirational. If you're in the mood for an amazing story and perhaps feel like crying check out this video...While waking around Edmonds I’d like to point out that the area was really beautiful! Based on the look of things I wouldn’t mind living there.
FOR EDUCATIONAL PURPOSES
Before we headed to the highlight of the day (well at least for me anyway) I wanted to check out a marijuana dispensary shop - for educational purposes.
It was surreal being there as growing up it has always been taboo. Now everyone and their mother is on the hype-train.
For those unaware marijuana is legal for recreational use in Washington state. It was crazy seeing people buying weed. It’s very much like being in a liquor store - you know why everyone is there - and that’s to get high!
And for the record - the war on drugs is a joke if you ask me. If you think about it you can get any drug you want in the most secure facility in the country and that’s prisons.
Plus if there really was a war on drugs why was the C_I_A drug trafficking in the 60’s and 70’s? This is not a conspiracy theory - but a conspiracy fact. Anyway, let's continue...
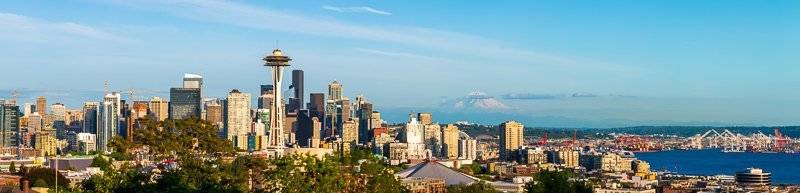
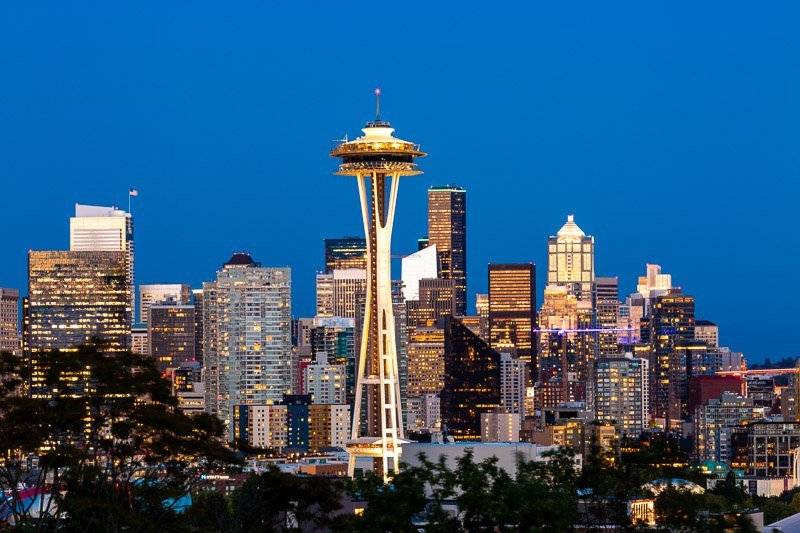
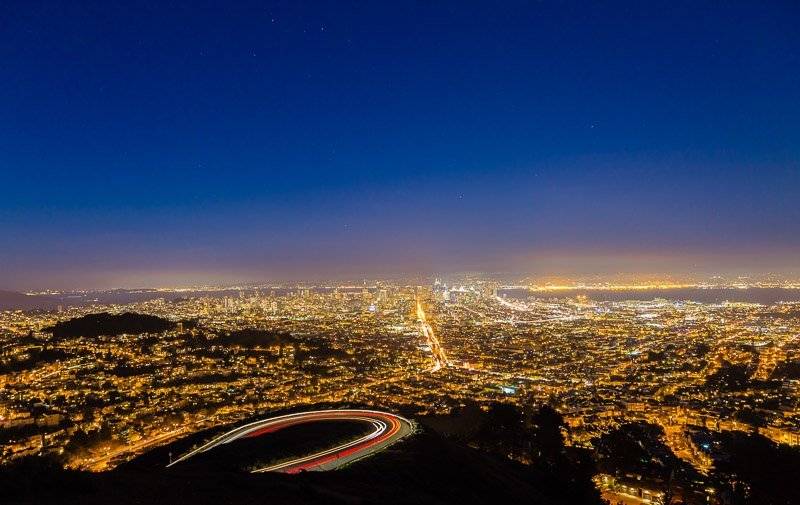
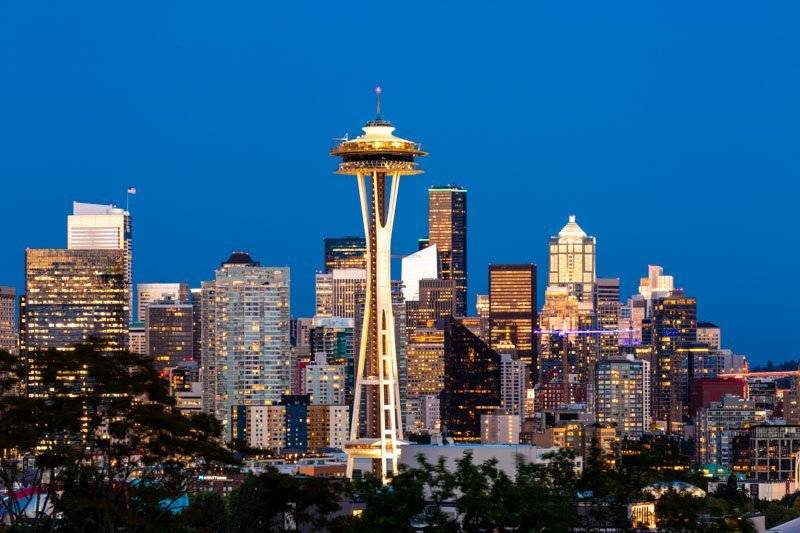
THE BEST PHOTO SPOT IN SEATTLE - KERRY PARK
The highlight of the day as I mentioned earlier was getting a photo of downtown Seattle from Kerry Park. If you Google “best photography spots Seattle” Kerry Park will be on any list.
In case you missed it click on the image below if you'd like to learn how to plan your vacations photos like a pro:
My research recommended that I get to Kerry Park early as photographers camp out way before sunset. Sunset time was 8:57 and we got there at 4.
It was a bit early but we didn’t have anything else to do. And this is what "early" looks like...
If you’re going to Kerry Park keep in mind that there are no bathrooms. So remember how I mentioned I really didn’t miss not having a car - well this is the only time I did as I could have drove to a bathroom.
Or worst case scenario I could have used a Gatorade bottle (if you know what I mean). Now I know some of you may be cringing but most guys at one point or another have used a bottle.
I’m sure if women had a penis they’d use a bottle in an emergency! LOL
So I had to find a to bathroom but it was a mission! It was about a 15 minute walk downhill before I could find anything. I found a sushi restaurant and bought some dragon rolls as I didn't have the nerve to ask to use their bathroom without buying anything.
I was really dreading the walk back as one thing people won’t tell you about Seattle is there are a lot of freaking hills. I’m talking about San Francisco level hills!
Like hills - everywhere. By the time I made it back to the park I was exhausted and it was starting to get packed with photographers claiming their spot.
Now thankfully my wife was watching my spot and she was able to make some new friends. Mostly other wives waiting with their husbands - lol.
I tried talking to some fellow photographers, but they didn’t look very friendly. The thing is, most photographers by nature don’t like each other. I have my theories - but that’s a story for another day.
I did however hit it off with this dude from Colorado and he mentioned that he also saw yesterday’s rainbow from Vancouver. The weird thing about the rainbow was that it was circular in the sky and not a half rainbow like you typically see.
One thing that really almost ruined the photos were the freaking trees! Apparently the trees aren’t typically that tall and the people in the town don’t want to trim them.
Oh and as a side note, aside from getting there early, be sure to claim your spot all the way to the right of the park as it’ll give you the best vantage point with less tress!
As another side note, I read that a 105mm lens would be good enough to get the city from Kerry Park, but I wanted to make sure I had enough reach - which if you read my previous post is the main reason I brought my 70-200mm lens.
So for the record I’m here to testify that indeed a 105mm is indeed good enough to shoot the city from this spot. But you can forget about using an ultra wide lens as you’ll definitely get too many tress in the shot.
Since I had a long time to wait, and I actually remembered (become sometimes I forget) to shot a panoramic image.
The final image is a whopping 381 inches by 74 inches. I don’t think I’ll ever print it out that large - but at least I have it in my archive!
One thing I’d also like to point out is how amazing it was to see Mount Rainier from here. If you can see it from this vantage point - you know this mountain has to be freaking huge!
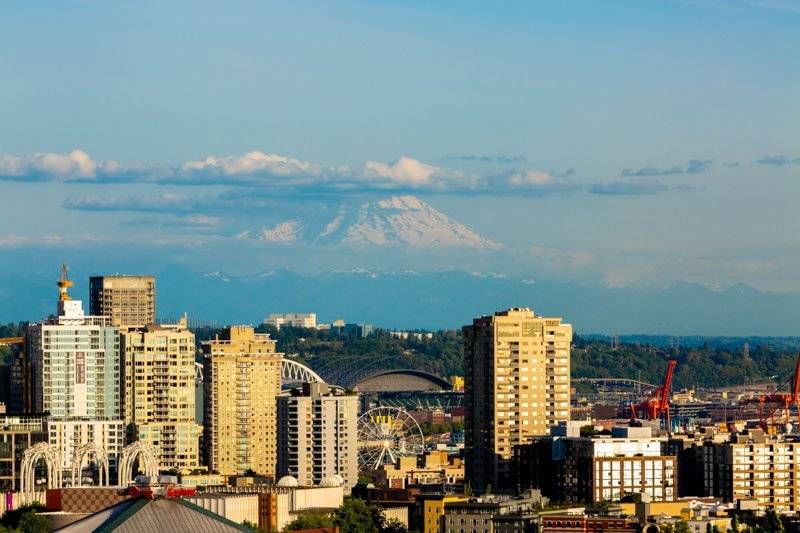
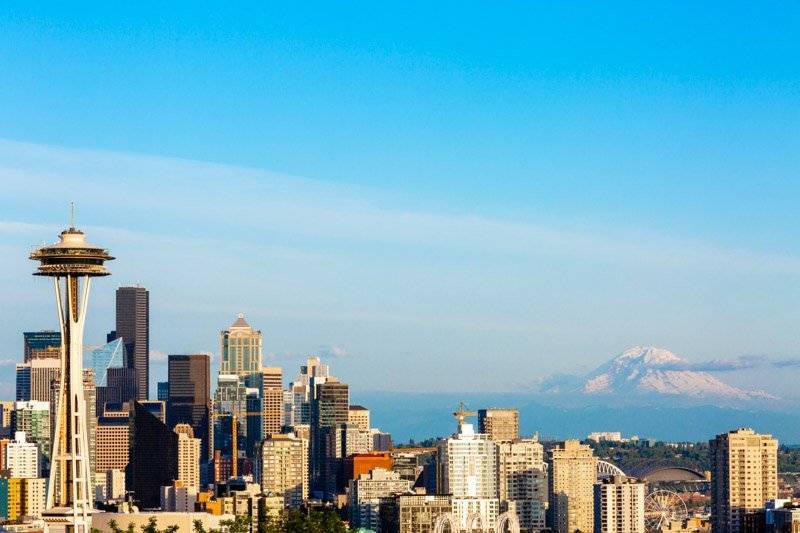
From what I gathered, it’s not always visibly seen from Kerry Park as Seattle is a very cloudy city. So given the fact that it was going to be a clear day, I really made an effort to get these shots.
There have been several times while on vacation, that I wanted to get out and shoot a sunset or a sunrise - but for whatever reason I didn’t get out and shoot.
Well now that I think about it, the reason is I’m usually too tired (at least in the morning). But then I end up regretting it. And until this day I’m still upset at myself for certain trips that I didn’t get up early.
When you're’ traveling, you never know if you’ll be able to go again, so it’s important to make the effort and sacrifice sleep to get out there to capture amazing shots!
Another thing I want to point out is Seattle during this time of year (late spring) doesn’t get pitch black until around 11pm. So keep that in mind if you want to get pitch black shots.
But if you know how to edit files in Lightroom you can always edit photos to your liking…


I wanted to get more night shots while I was here - but my wife was exhausted and lost any little patience she had as it was already 9:50pm. Plus our bodies “real feel” time was 12:50am since we live on the east coast.
So we called it a night and headed back to the hotel.
STAY TUNED FOR PART 2 COMING THIS WEEK!
Mikey Colon
👉🏻To purchase prints or to license images I can be reached at...
🌍 www.colonphoto.com
🖥 mikey@colonphoto.com
📞 917-703-0346