
Introduction
Best viewed on my website blog here as it seems the formatting has been wiped completely from steempress and I can't be bothered to update it all! Update - I couldn't let the formatting issue go so I redid it all to make it look for Steemit. Hope you enjoy the journey :)
As if the title of this blog alone wasn't alluring enough with the promise of a Liquid Drum & Bass track but add to it my experience of completing one of the toughest physical challenges the UK in the form of the UK 3 Peaks Challenge, well, you have yourselves a pretty epic journey ahead of you!
You know the drill. It's not "just another track here" but one I made in celebration of completing the challenge. Furthermore, the main melody was inspired by a well known singer that those of you who are in to your 70s music may recognise. More on that later. First, let's get going on the 3 Peaks Challenge.
What Is The UK 3 Peaks Challenge?
In simple terms, all you need to do is hike up and down the highest mountain in Scotland, England and Wales in under 24 hours, including travel time. So who wants in? Haha! This is not a challenge for the lighthearted that's for sure and it's not one of those that you can just "turn up and do" (unless you're one of the lucky ones)! So what are these 3 highest mountains?
Ben Nevis, Scotland
Standing at a proud 4411ft or 1345m, Ben Nevis is the tallest mountain in the UK, with the nearest town being Fort William. In Gaelic, the name of the mountain actually means "Malicious Mountain", which is certainly true as when you think you've scaled one zigzag there's another staring you right in the face! Source
There are a couple of places I have been to where you can start the ascent from - Ben Nevis Visitor Centre and Glen Nevis Youth Hostel.
Ben Nevis Visitor Centre, PH33 6ST
When I first attempted the UK 3 Peaks Challenge in 2013, this was the car park we started at. Helpful because it has toilets that you will definitely want to make use of at the visitor centre! Cost of parking is either £3 for a car or about £10 for a minibus for the day - more information about the car park can be found here.
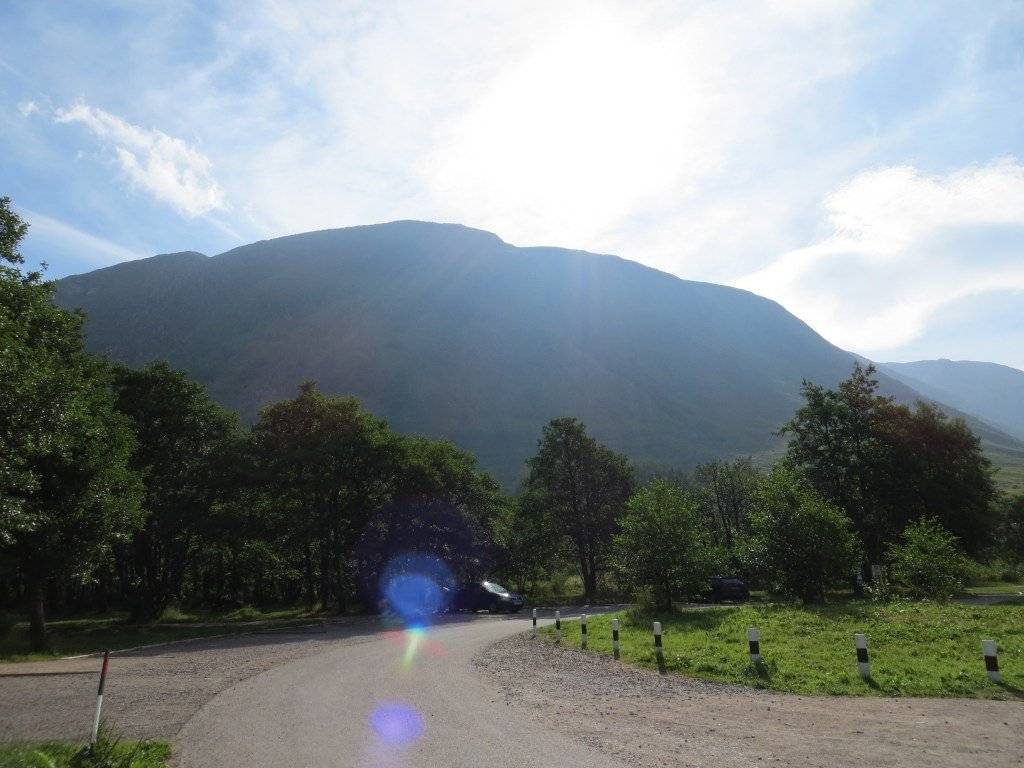
Ben Nevis Visitor Centre Car Park - That's not even Ben Nevis!
You'll start by crossing River Nevis and walking along the Mountain Track for about two miles before you catch a glimpse of the summit. A nice way to get the legs warm but if you wanted the most direct route and save yourself this two mile section then you may be interested in starting from the...
Glen Nevis Youth Hostel, PH33 6SY
This is where I stayed at the second attempt of the UK 3 Peaks Challenge in July 2014. It's a little bit further down the road from the Ben Nevis Visitor Centre but has it's own access foot path to the main Mountain Track. It's a steeper beginning for sure but it gets you on to the main path quicker.
Prices start from about £27 per person for the night but when we went in July, there were a few other protagonists who also wanted to do a bit of hiking. Males and females stay in separate dorms but I have to admit, it was a bit of a sweat fest when we stayed back in 2014. Not much ventilation, it was a warm evening and there were about 15 males in the dorm. I'll leave that image with you ;) Shower facilities were OK and we had our own breakfast. The staff seemed friendly enough but we didn't really spend that much time conversing with them or indeed actually in the hostel.
Ben Nevis Ascent
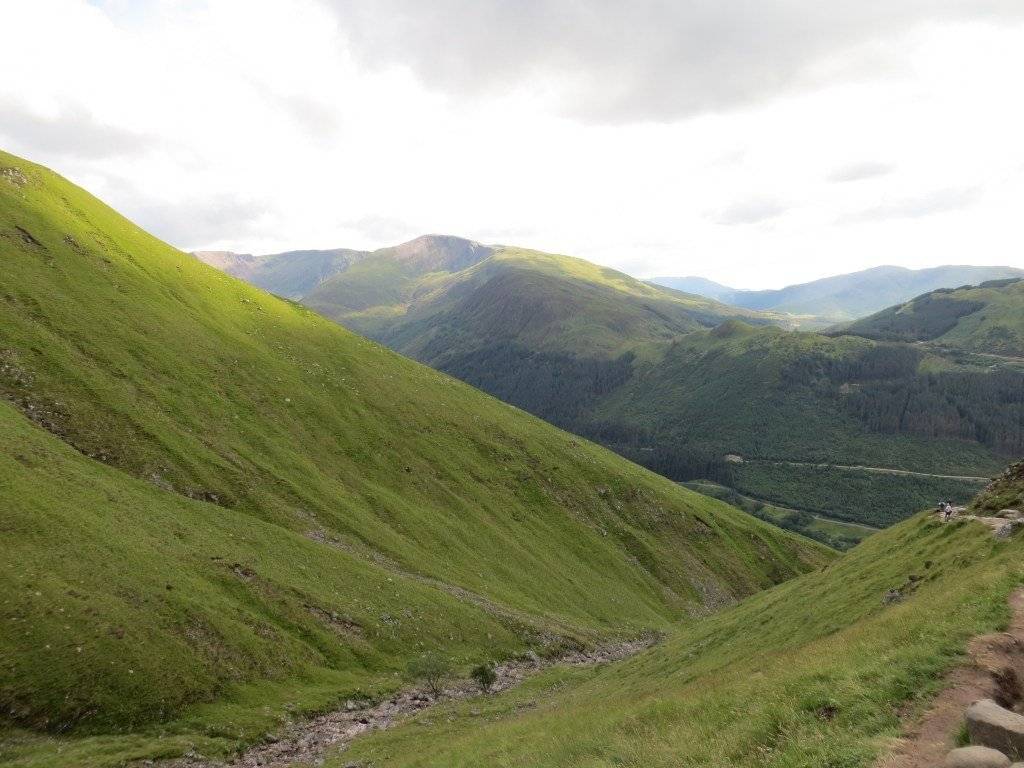
The path to the summit (Mountain Track) is pretty well defined from both entrance points I've mentioned and if you go in peak season between May - September, you won't have a problem as long as the weather is "relatively good" i.e. not chucking it down with rain and visibility is decent. Furthermore, there will usually be people on the trail so you can use a bit of common sense to trace back and see how they got up there. At lower levels, the views are quite spectacular.
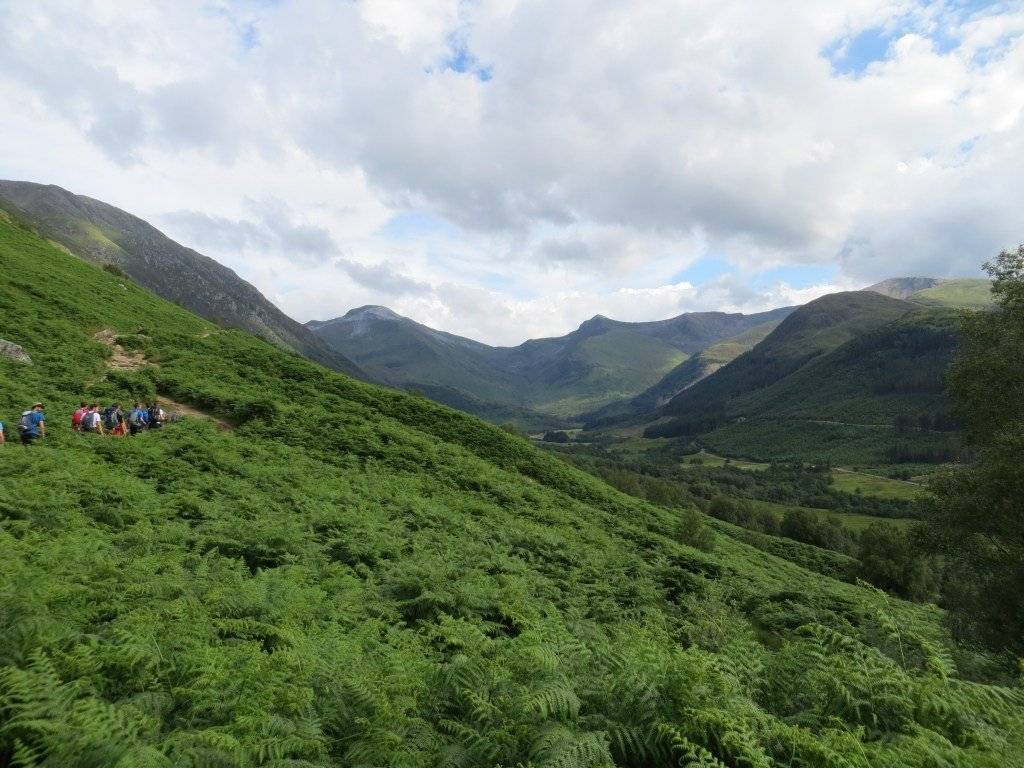
The 2013 gang making their way along the path from the Visitor Centre
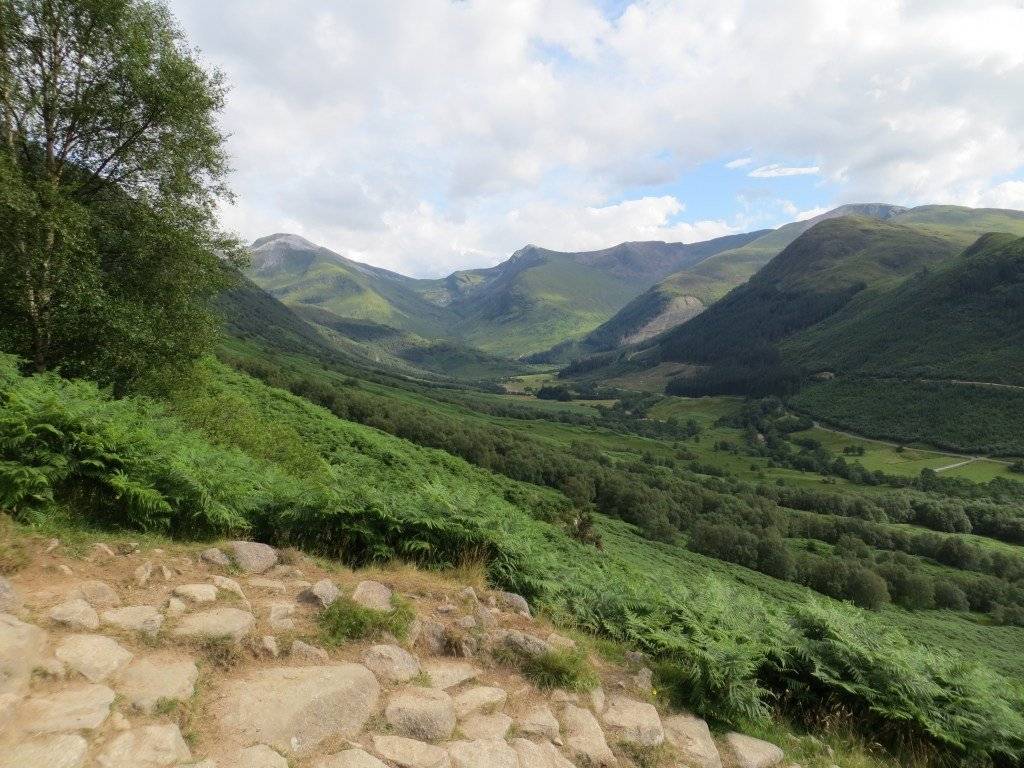
The path from the Visitor Centre offers some great views of the valley
From the Youth Hostel, make your way up the path and take a right as you join the Mountain Track.
The track then takes a big bend around to the left as you reach the "half way point" called Lochan Meall. This is where you actually cross over to join Ben Nevis and series of gradually flattening zigzags on the shale path. It's pretty well maintained so you should be OK as you make your way to the summit.
Halfway point of Lochan Meall
You'll need some grit and determination to make your way up!
Ben Nevis Summit
As you start getting towards the top, the well distinguished path becomes loose shale and you need to look out for stacks of man-made rocks, called cairns, that will help guide the way. At the summit, you will see ruins that were actually part of a meteorological observatory built in 1883 as a means to measure mountain weather. However, it only lasted until 1904 when it was closed due to a lack of government funding. More information about this interesting part of Ben Nevis' history can be found here.

On the left is the ruins of the observatory.
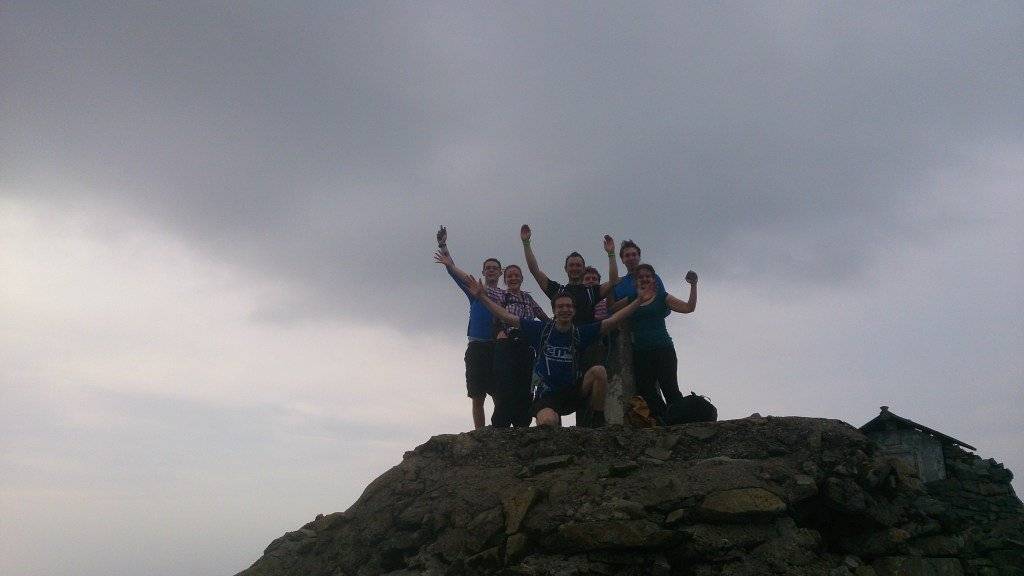
Making it to the the summit of Ben Nevis in July 2014
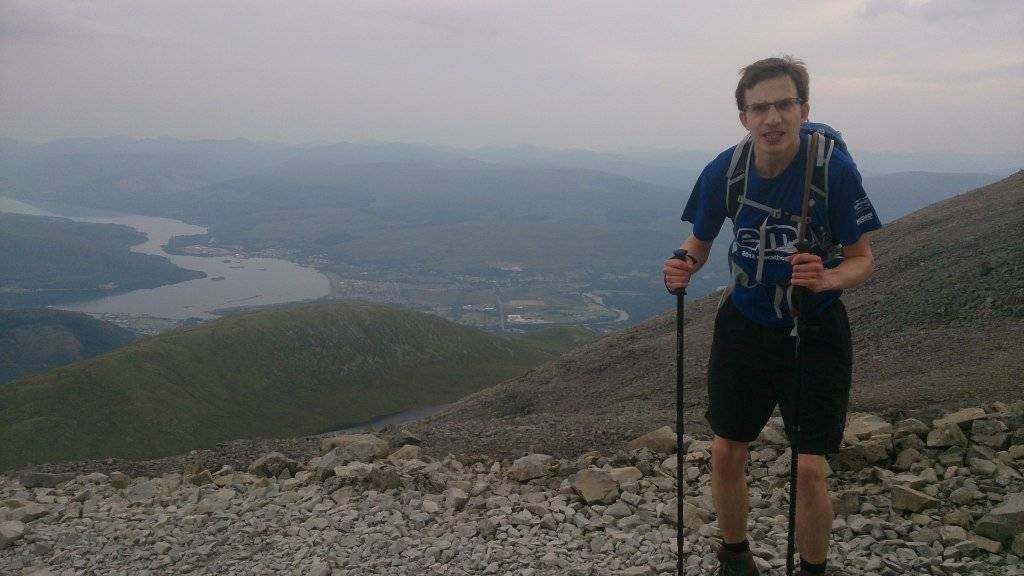
It's likely the summit will be surrounded in a cloud layer and you will notice the temperature drop by a couple of degrees Celsius up here. Even in July, there'll be some patches of snow around and if you stop moving, the wind will add to the chill! Nonetheless, if you get a clear day like we did above, the views are pretty amazing although it can change very quickly.
Ben Nevis Descent
For the descent, you actually just take the same Mountain Track back down again so I hope you remembered the way :P The views are even better somehow on the descent so try to stop briefly and look up if you can! However, take care because it can take its toll on the knees if you start hammering it down the path. You'll always be quicker going down a mountain so just make sure you get down in one piece, look out for loose stones and have a firm footing!
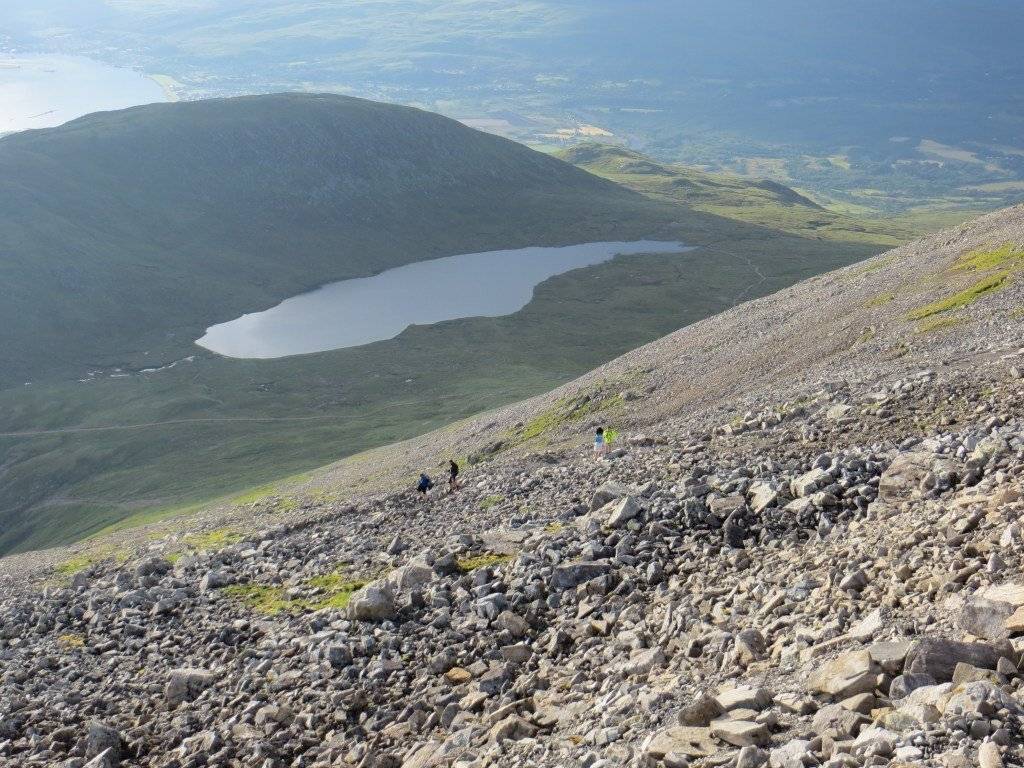
Beautiful scenes as you come back down Ben Nevis but watch out for loose rocks!
Duration Of Ben Nevis Hike
If you're well drilled, in good shape and don't faff around, you can go up and down Ben Nevis in 4 - 4.5 hours. We did it in 5 hours from the Youth Hostel which is probably the time limit you want to do it in.
Other Ben Nevis Tips
This is the longest hike and the tallest of the mountains in the UK 3 Peaks Challenge so it's good to get this one done first and as quickly as possible as you will be the most fresh for it (assuming you had a good night's sleep) so give this a bit more effort!
Make use of the toilet facilities at both the start points we mentioned, even if you don't feel like you need to go because there is nowhere to go up the mountain!
So now that we've successfully got Ben Nevis done, let's find out more about our second peak - Scafell Pike, England.
Scafell Pike, England
The highest mountain in England (but the shortest mountain in the 3 Peaks Challenge) is Scafell Pike, based in the Lake District and standing at 3209ft or 978m high. It's believed the name derived from the old Norse "skalli fjall" which means the "fell with the bald summit" (assuming you get to see the summit of course). Source
For the challenge, there really is only one option to start from and that is the...
Wasdale Head Car Park, CA20 1EX
The post code is an approximate location so you will need to look out for the signs to get there (or if you're OS Map savvy, the reference is NY187085). There are other places to park but this is the most direct route to the summit compared to some of the other start points. Car parking is free here but that means a lot of people may also be interested in parking there so hopefully you will have a space!
Scafell Pike Ascent
You'll need to take a little more care on the ascent as the path isn't quite so clear cut so make sure you have a few people capable of reading maps with you! Or better still, someone with experience of hiking up Scafell!
Follow the signs for the public footpath from the car park and you'll reach a bridge that crosses Lingmell Beck. You want to make sure you follow the path south which marks the start of your steep ascent. This path joins a main path that you follow until it splits (at the green cross on the map below). Make sure you take the right at the split (if you have an OS map, look for "Mickledore Col", otherwise you'll end up in completely the wrong direction!
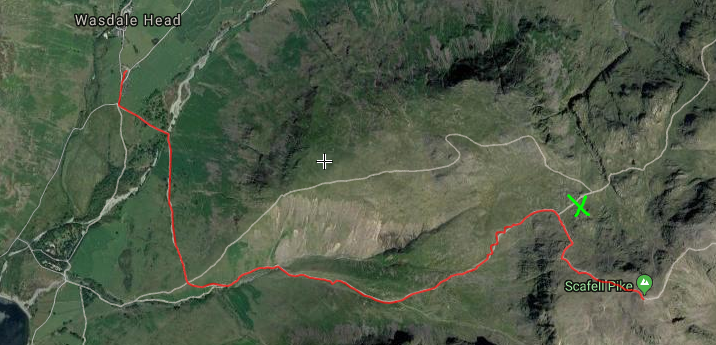
Satellite image of route. Take the path to the right at the green cross!
Map drawn via Scribble Maps
There is another sharp ascent here but it does plateau quickly. The path is basically a load of boulders and rocks so look out for the cairns to the summit here. Make sure you remember where you came from because visibility can get poor very quickly, especially in the Lake District! When we did it, visibility on the summit was very poor indeed!
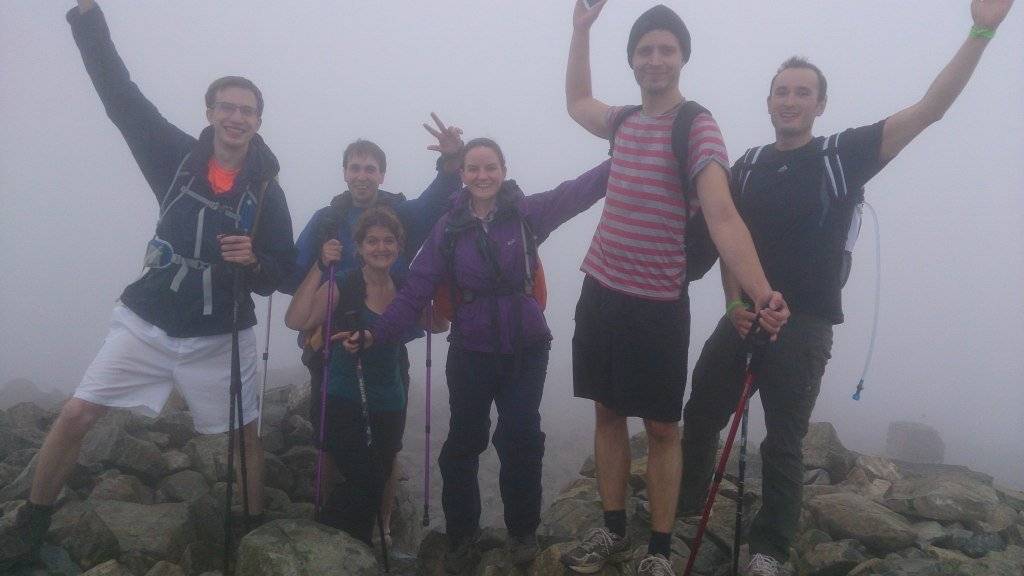
Yes we did actually make it to the summit of Scafell Pike! Great views right?
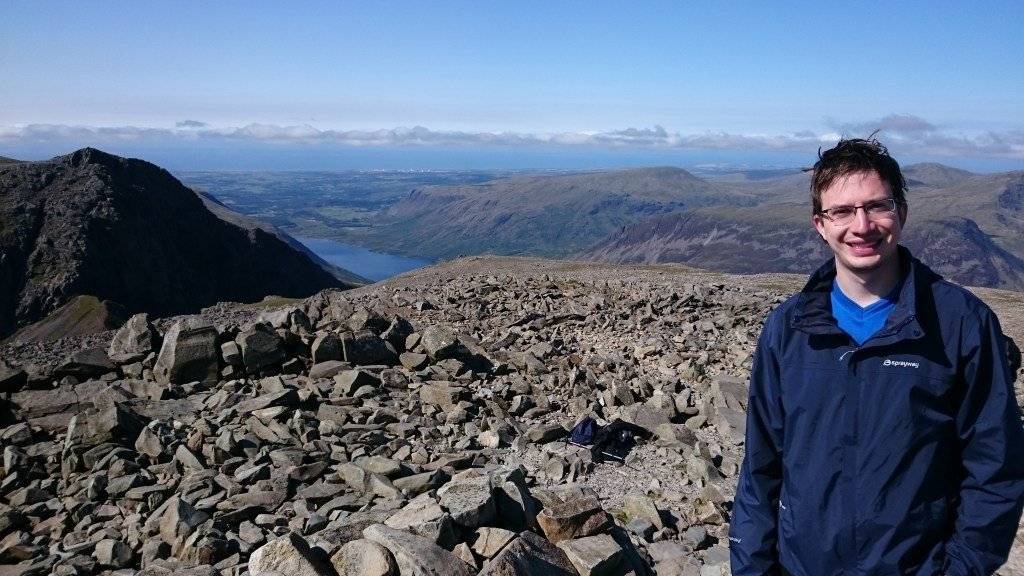
When I walked up Scafell Pike again in 2015 with my brother, the weather was a little kinder to us! This is what you may see if you're lucky!
Scafell Pike Summit
As you can see from the pictures above, you can have completely mixed views! Hopefully you have the latter when you do your hike but you will see a couple of features that distinguish the summit - a "trig point" (pillar of known co-ordinates) and the summit cairn. If you do have good visibility, take it in... but only briefly as you're against the clock haha!

The cairn and trig point marks the summit of Scafell Pike [Image Source]
Scafell Pike Descent
Remember the route you just took to get up to the top? Well, you're going to have to go back down that same route again all the way back to Wasdale Head Car Park!
Be very careful if visibility is poor and don't take the path where the green cross is in the above map! Once you start descending out of the cloud layer, it does begin to clear so visibility is a bit better and you can see the path again. It is very eerie and disorientating when all you can see around you is fog! Still, when it clears up, you may see your weary comrades!
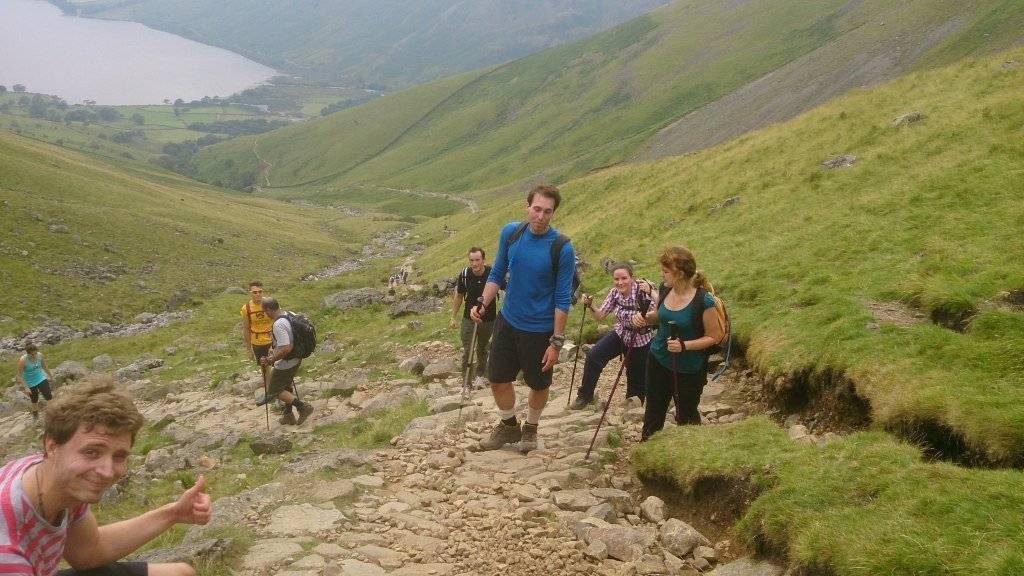
Weary comrades making our way down Scafell Pike
Duration of Scafell Pike Hike
If you're feeling fit, conditions are good and you have someone who knows exactly where they are going then there's no reason why you can't do this hike in 3 hours. We had pretty abysmal conditions when we did it so it took just under 4 hours. In mileage, it's about 6.5 miles or 11km.
Other Scafell Tips
I may sound like a broken record but make sure you have someone in your team who has hiked up Scafell before! It can be dangerous with the various paths and if you don't know what you're doing, it's very easy to get lost. It was the mountain we were least looking forward to because of this and the steepness but in truth, it can be over very quickly as it's the shortest of the 3 hikes and should take you between 3.5 - 4 hours.
My recommendation is to do this in day time if you have any concerns like we did. This will require you to do a bit of planning with your timings, which I'll go through later in the blog. At this point, you may start to be a little more tired as you have just walked up two mountains but we've still got one to go as we make our way over to the third and final ascent, Mount Snowdon!

Mount Snowdon, Wales
Mount Snowdon is the highest mountain in Wales standing at 3560ft or 1085m and is located in Snowdonia National Park in Gwynedd county. It's Welsh name is "Yr Wyddfa" which means "The Barrow" and the word "Snowdon" is the old English way of saying "Snow Hill" - Source.
There are many ways to head up and down the mountain, including a train but unfortunately we couldn't use that although we'd have liked to! Instead, we chose to go up the "Pyg Track" as it's the most direct route up and then returned via the "Miner's Track". Where to park though?
Pen y Pass Car Park, LL55 4NY
This is the main car park to begin your ascent up Snowdon and it is definitely NOT big enough so you need to bear that in mind for when you embark on this mission! Spaces fill up very quickly during peak season and you'll do well to park further down the road without getting a parking ticket. If you decide to park further away, this will also add time on to your hike and expend energy, which is probably running low at this point!
It costs £10 for 24 hours to park here but once you've sorted that out, you will see a signpost at the right side of the car park that will lead you to the Pyg Track.
Snowdon Ascent
Although Pyg Track is the shortest route in terms of distance, it is also the most rugged so care needs to be taken. The jury is still out on where the name came from but to me, the most logical reason behind it's name is because this path was used by miners to carry pyg (black tar) from the nearby copper works [source]. Wherever the name comes from, it doesn't matter as we have a mountain to climb!
As you begin the climb, and it really is a climb, you'll see some amazing views of the Glyderau Mountain range and valley off to the right, carved out from the last Ice Age.

Views of the Glyderau Mountain range as you make your way along the Pyg Track
As you follow this track up and around, you'll reach a fork - take the left path here. This continues upwards and rises above another trail called the "Miner's Track". We'll be trotting along here in our rush to the end!
It's certainly a very picturesque view as you look down to the valley below. The Miners Track joins the Pyg Track a little bit later and is marked by a standing stone.
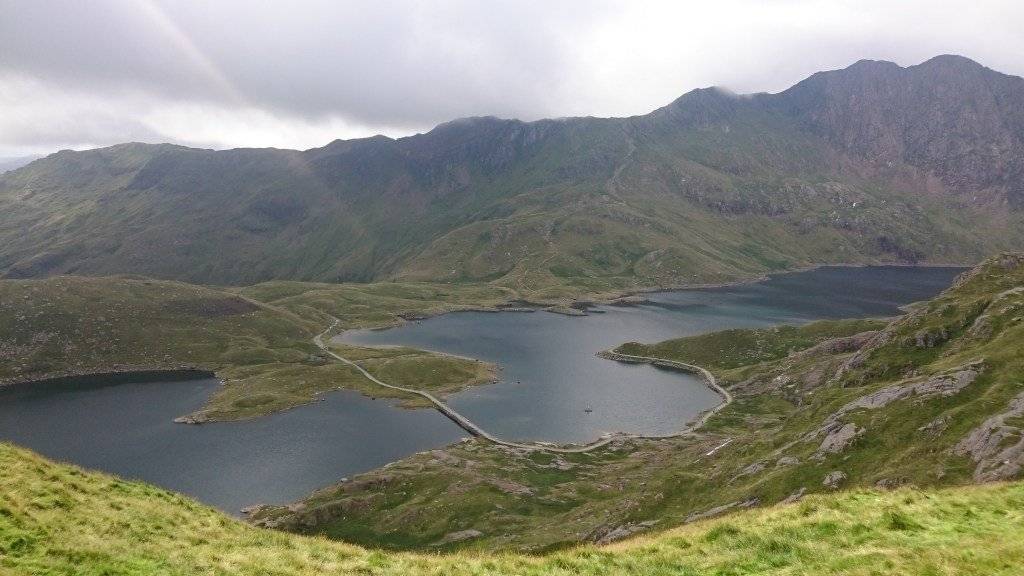
The Miners track down below is where we'll be heading after reaching the summit!
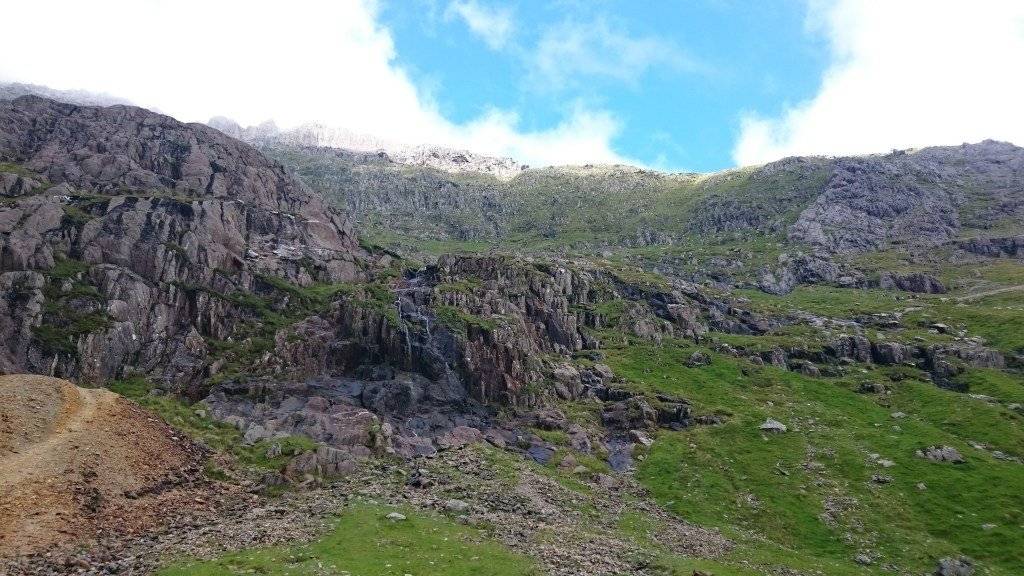
Take note of this standing stone as that's where you'll need to go on the way back down. For now though, we have a steep ascent up to the summit in the form of zigzags which you need to be careful of. A stumble here and you may be mined yourself!
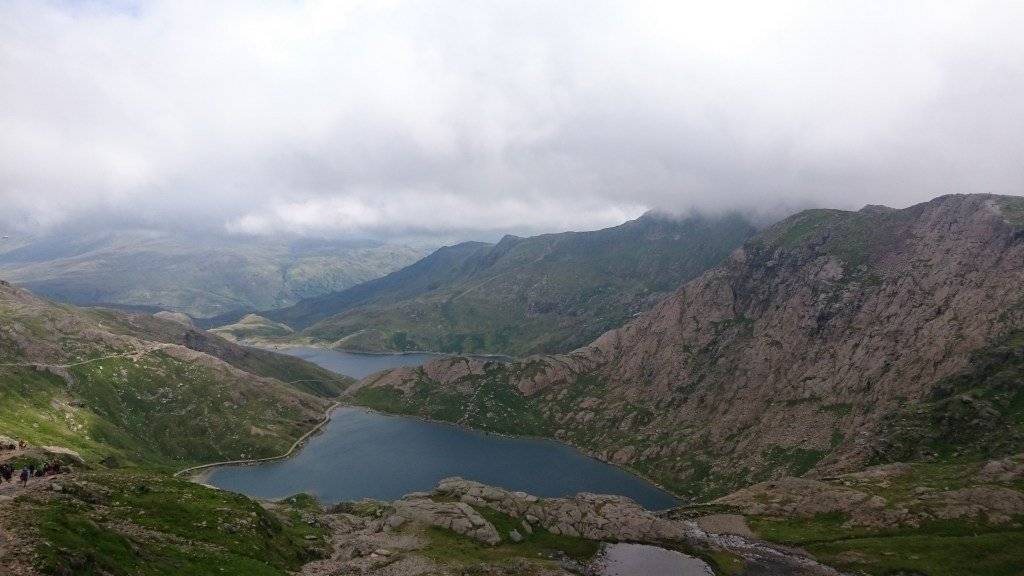
Looking down the valley after a steep climb but looking the other way...
...we have a little while to go!
Once you have completed that steep ascent and scramble, it opens out as you get to the summit ridge. You will certainly know you're there as you'll be met with a strong, relentless breeze. Take a left as you enter the ridge and take note of the standing stone here as you'll need to come back this way once you've reached the summit.
Snowdon Summit
Carry on walking along the ridge and you'll reach the summit, marked by, you guessed it, a cairn with a few steps up to a trig point :) You'll also see the train station which is a sure sign that you're at the right place! If you get lucky and there's good visibility, you might see some of the amazing views too. However, I've been up Snowdon 3 times and this is all I have seen haha! Never mind hey.
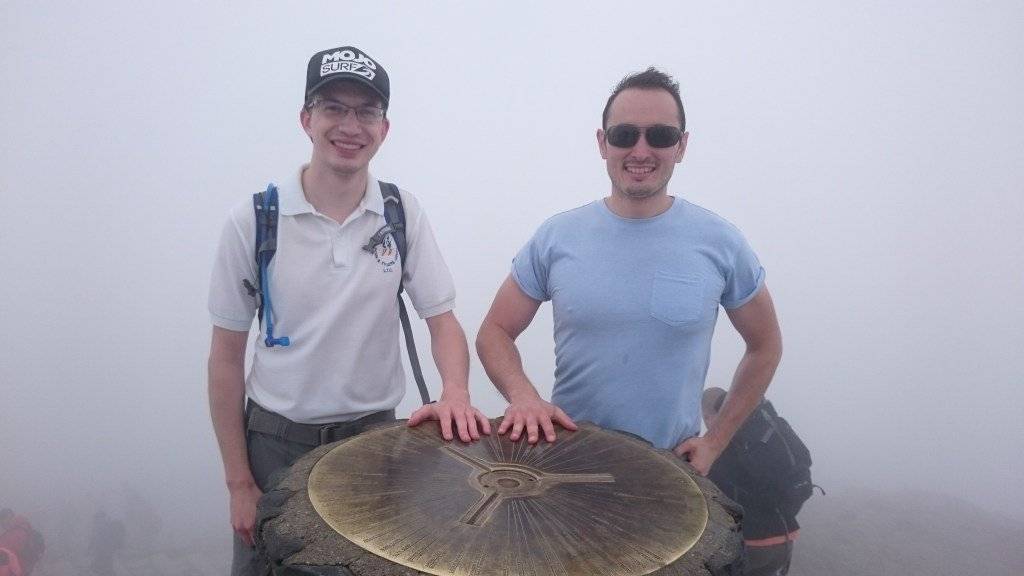
The summit at Snowdon, I'm sure there are great views somewhere!
Snowdon Descent
No time for dilly dallying around at the top, we need to get down to the bottom to complete the challenge! Let's get out of this cold wind and start making our way back off the windy summit from where we came. Look for the standing stone on the right to mark the turn off.
Begin the descent down the zigzags and look out for the other standing stone we walked past to signify the Miners Track to the right. This is where we need to go to complete the challenge. The path begins to flatten out as you get to the bottom but just when you think it ends at the next corner, there's another long stretch of trail to walk along! You'll pass various ruins including an old crushing mill which still has the old hammers used to extract the ores.
However, after about 2 miles, you'll be greeted with relief, an awesome sense of achievement and the sweet looking view of the Pen y Pass car park as you have made it to the end! Congratulations!
Duration of Snowdon Hike
If you're still feeling fit before starting the Snowdon hike and you know where you're going then you could even complete Snowdon between 3 - 3.5 hours. When we did it in 2014, it was in the early hours of the morning and pitch black! We had to use head torches and get a bit of running going down the Miners Track as time was running out! In mileage, it's about 7 miles or 11km.
Other Snowdon Tips
You may have to do a bit of scrambling as you make your way up the Pyg Track. It does get pretty rough in places. I strongly recommend you do a practice hike to get familiar with where all the landmarks are and don't be afraid to do a bit of "bum sliding" where you sit down, shuffle along, swivel and lift your legs up to the next level.
Now that you know a bit more about the mountains, let's go through some other essentials, tips and tricks you need to know to complete the UK 3 Peaks Challenge!
UK 3 Peaks Essentials
Training
A majority of people will need to train for this because it is a physically exerting challenge! So the best way to train is to organise hikes at one of the mountains (or all 3 even) so you are familiar with the routes you need to take. This will get you used to walking up mountains, which can't really be mimicked by walking up stairs or by solely doing squats!
When we went training, I organised 3 hikes to help get us in shape in the 2 months before the event. Some members of the team turned up, some didn't and it showed during the challenge. These are the three training routes we did: Malvern Hills (1394ft or 425m), Brecon Beacons Pen Y Fan (2,907 ft or 886m) and Snowdon itself.
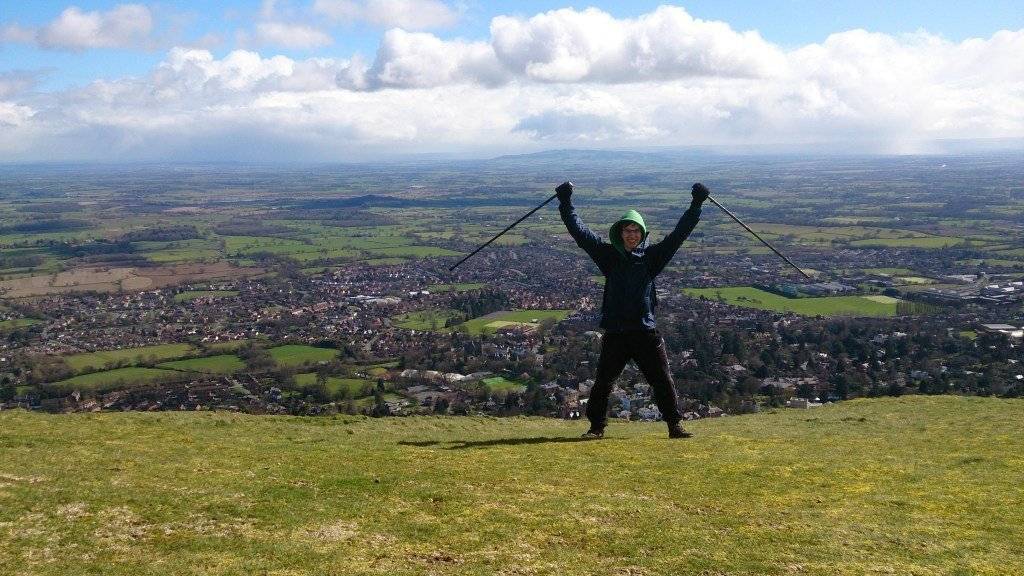
The top of the Malvern Hills, UK - M for Malvern!
It's not just fitness that the training is important for but it's also very useful to know where any blisters or rubbing may occur. This is where blister plasters come in handy as you can mostly prevent blisters from happening by putting the plaster over potential problem areas (hot spots). Better to get a blister in training than it is 2/3 up the mountain in the challenge! And don't forget to put the plasters on before the challenge please :)
Also, training gives you a chance to see who the fastest and, most importantly, your slowest walkers are. Everyone has a different pace and this is a team effort so you need to know people's pace and it will help team morale by getting used to people's speed. You're only as fast as your slowest walker so pacing is very important in a time limit event such as this.
Equipment
This should be pretty obvious but you do need a pair of ankle supporting hiking boots! When I first attempted the challenge, we had an ex-soldier as a trainer and he didn't pull any punches - "anyone who wears flip flops deserves to break their ankles" - strong, but I liked that approach :D Make sure you wear the hiking boots in properly during your training though as you definitely don't want to wear brand new shoes for the challenge!
Get some hiking poles if you feel you need to for extra support but bear in mind, they may get in the way when you're scrambling up Snowdon and a lot of the paths are just shale so not a solid ground to plant them. Also think of where you can store them during the hike safely so there isn't a risk of poking someone's eye out or losing them.
Make sure you have the right equipment! [Image Source]
Camelbak or water bladders are essential not just for keeping you hydrated but also saves you time having to stop to get a bottle out of your back pack. You don't want to be "that person" who is holding everyone up because you have to stop and get your drink out of your backpack. Playing catch up is not fun either!
Of course, don't go hiking up mountains if you don't have an OS map with you and make sure you know how to read it. Or at least with someone who knows how to read one :)
You're going to be hiking one of the mountains in the dark so you'll need a method of illumination. Head torches are the best bet as they're hands free but you can get all sorts of powerful LED torches with "the lighting power of a million candles"!
Get a comfortable, lightweight backpack so you aren't weighed down by any unnecessary extras and make sure you train with it as you'll be surprised how much extra weight there is with water and snacks.
Food & Drink
Hydration and replenishing your energy is something else you really need to be wary of. A refilled 2 litre Camelbak should be more than enough to get you up and down each mountain. Take snacks with you like nuts, seeds, bananas - these kind of high energy foods will help keep you going.
The time to replenish with pastas, sandwiches, carb and proteins is when you're in transit between mountains - no picnics on the hikes themselves! Also, don't eat right before going up the next mountain otherwise you'll get a stitch! Sweets are also OK to have as long as you don't over indulge as you'll need to replenish glucose in the body as well.
Transport
How are you going to actually get around the 3 Peaks in the UK? You certainly don't want to be driving if you're actually hiking up the mountains as that's a recipe for disaster - you'll be exhausted and unlikely to focus on the road. So you can either ask one of your mates to help out who isn't doing the hiking or you can pay for a transport company.
We went for "Carl's Minibus" as he was a decent price, well experienced and was the most supportive out of all the companies that we reached out to. He was knowledgeable about which routes to take, gave advice during our training (even though he didn't come along) and was very calming when we were starting to get a bit panicked! Very professional and I highly recommend him.
Bear in mind that for legal reasons, the driver will need to have a 1 hour break when they switch over as they aren't allowed to drive longer than 17 hours in a 24 hour period. This 1 hour break will not affect your total time as it's a legal requirement and there's nothing you can do about it.
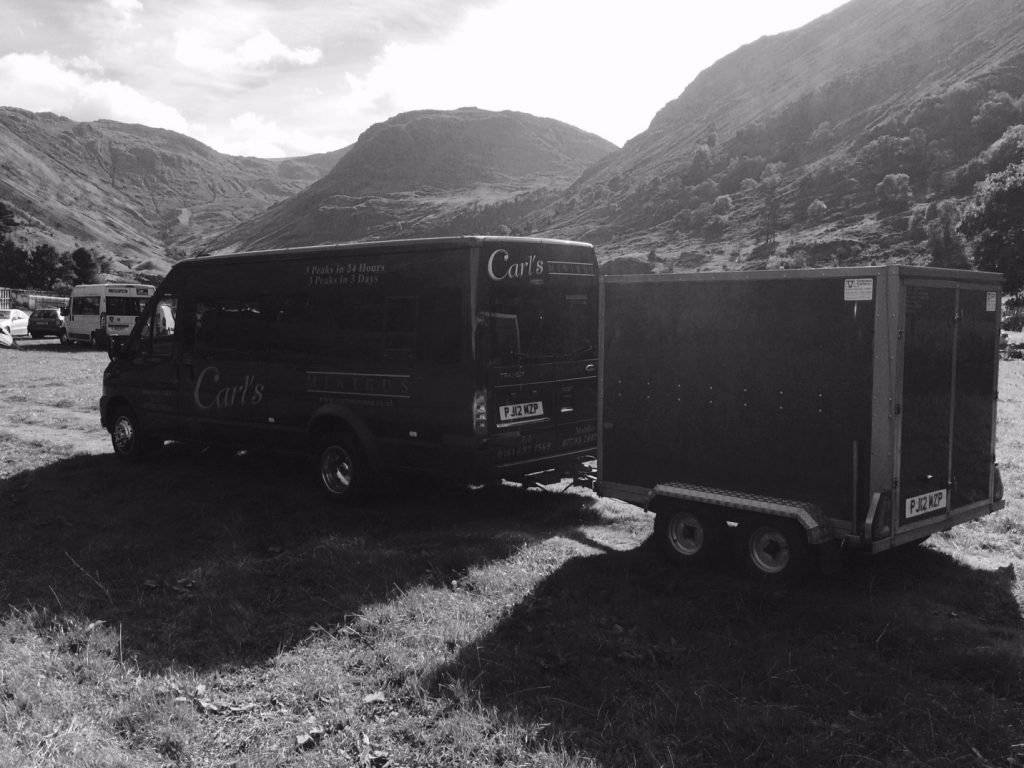
Carl's Minibus with trailer for your gear [Image Source]
Timings
As I touched upon earlier, you'll be most fresh for the first peak, Ben Nevis, so you will want to give yourself as much of a chance as possible to complete under 24 hours by going for this one a little bit more (not all guns blazing but a firm effort). With travelling time to take in to account as well with this challenge, you don't want to be at the mercy of traffic and road works! So with that said, here's the timings we did ours in to help give you some idea for when you go for the challenge:
| Location | Start Time in Day | Duration |
| Ben Nevis Hike | 05:00 | 5 hours |
| Drive to Scafell Pike | 10:00 | 5.5 hours |
| Scafell Pike Hike | 15:30 | 4 hours |
| Drive to Mount Snowdon | 19:30 | 6.5 hours |
| Mount Snowdon Hike | 02:30 | 3.5 hours |
| Complete UK 3 Peaks Challenge | 05:35 | |
| Total Time (1 hour driver break factored in) | 23:35 |
As you can see, we decided to start at 05:00 as we wanted to do Scafell in the day time seeing as it was the one that we were least confident about. However, people usually go for the 17:00 start but really, it's up to you.
You may reach the summit of Snowdon in the dark!
Sleeping
Don't expect to get much sleep on the minibus or on this challenge for that matter! I did doze off a little bit on the way over to Snowdon but left it late with about an hour to go before we got there which made it VERY difficult to get going again. So if you're going to rest, try and do it as soon as you have got everything ready for the next hike and eaten something.
Preparations
The best time to make preparations for the next hike is as you're in transit. Time is precious in this challenge so you need to minimise time wasted by "faffing" around. Get everything ready for the hike that you need so as soon as you arrive at the car park, you can get on with it. I faffed at Snowdon because I didn't prepare fully before falling asleep and we lost a few minutes - I was "that guy" haha!
Team Ethos
Obviously, you need to have a good team with you and it may be that they don't all make it. Only 5 of the original 10 from my team completed it and there's absolutely no shame in bailing half way through. In fact, it's the opposite because it's very honourable to realise you're struggling and to call it a day rather than hold up the rest of the team.
It's up to you who you pick but you need strong, positive characters, people willing to put in the training, getting to know each other and being well organised.
UK 3 Peaks Challenge Summary
There is a plethora of information out there about the UK 3 Peaks Challenge. You may feel it's a walk in the park but it's not if you want to do it under 24 hours. It is a tough challenge but it's a very unique experience and you get to share it with your friends. Make sure you train properly, do your research from this blog and many others out there and go geddit!
Liquid Drum & Bass Inspiration
Now let's move on to the Liquid Drum & Bass track I made to celebrate completing the challenge back in July 2014, which I aptly called "3 Peaks". The ambience of the track is meant to represent that high energy and euphoric feeling of completing the challenge in under the 24 hour time limit (23h 35m). All the preparation mentioned above was worth it as we enjoyed the party... a week later that is once we all recovered from the challenge haha!
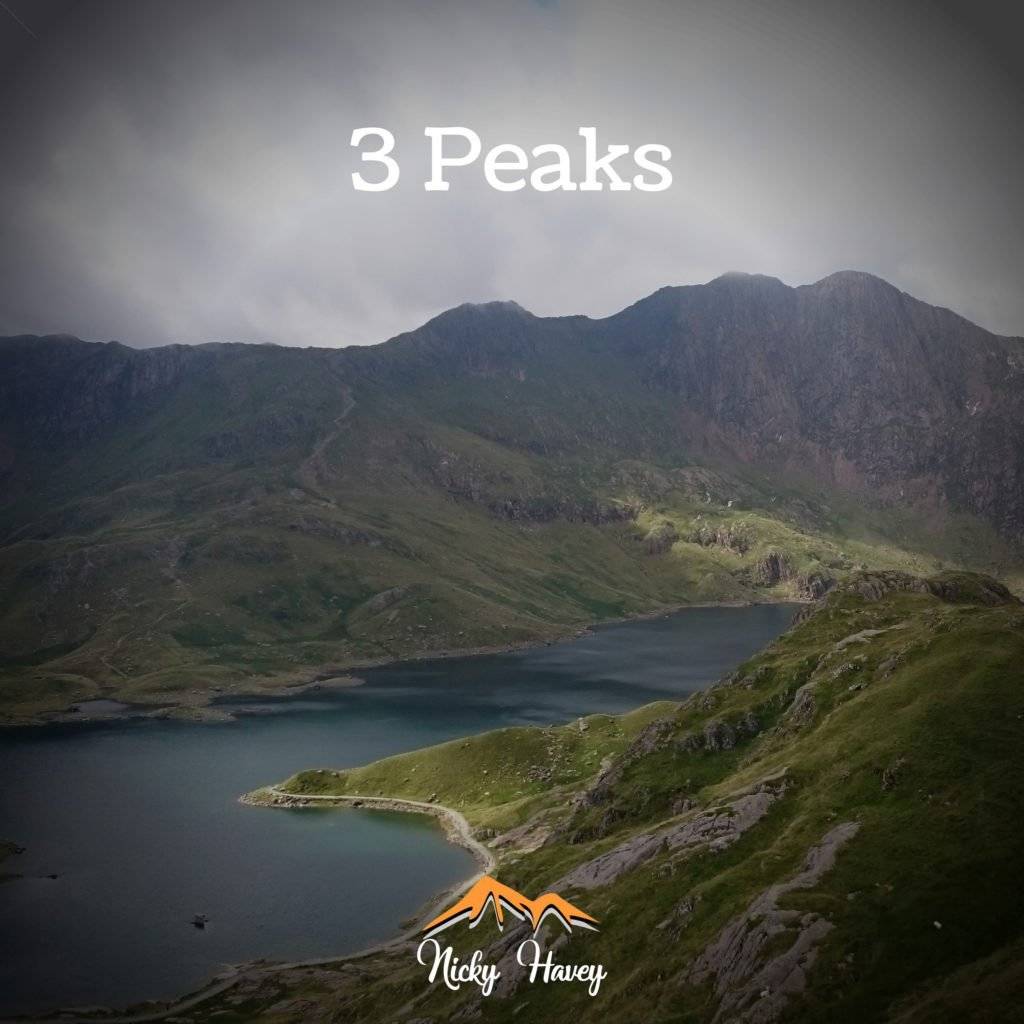
3 Peaks cover art - recognise this? :)
The main melody in this one is inspired by a song that the 1970s pop music fans may be familiar with. In the blogging community I'm part of called the "Power House Creatives", we were all hanging out in the Discord last Friday sharing our favourite tracks from the 90s when I said, "I bet you can't name the track that influenced the main melody of 3 Peaks". I had no idea everyone was so competitive so head honcho @jaynie decided to create a snap contest.
Power House Creatives Snap Contest
On the blogging platform I use called Steem, the prize for guessing this track was 2 Steem tokens which helps future post earnings. The clue I gave was, "It's the melody from the first line of the verse in this 1970s number 1 hit". @cheese4ead stepped away once he found out it was 1970s, not his forte. Jaynie fired a few guesses, @wales cogs were turning too but to no avail.
However, out of nowhere, @mattifer stepped in with the correct answer without even saying "hello" haha! But can you guess what the original is that this is inspired from? Here's the 3 Peaks track - listen out for the main melody and see what you think. Click here if you can't see the player below:
Ring any bells? No? Alright then, let me put you out of your misery. It is in fact a melody inspired by Cher's number 1 hit from 1971 called "Gypsies, Tramps and Thieves". Listen out for the melody of the first line of the verse and see if you can spot the reference :)
So well done to Mattifer for getting it! Seems the 3 Peaks track also went down well with Choon co-founder Gareth Emery as he left an awesome comment on it which made my day!
Foundations EP
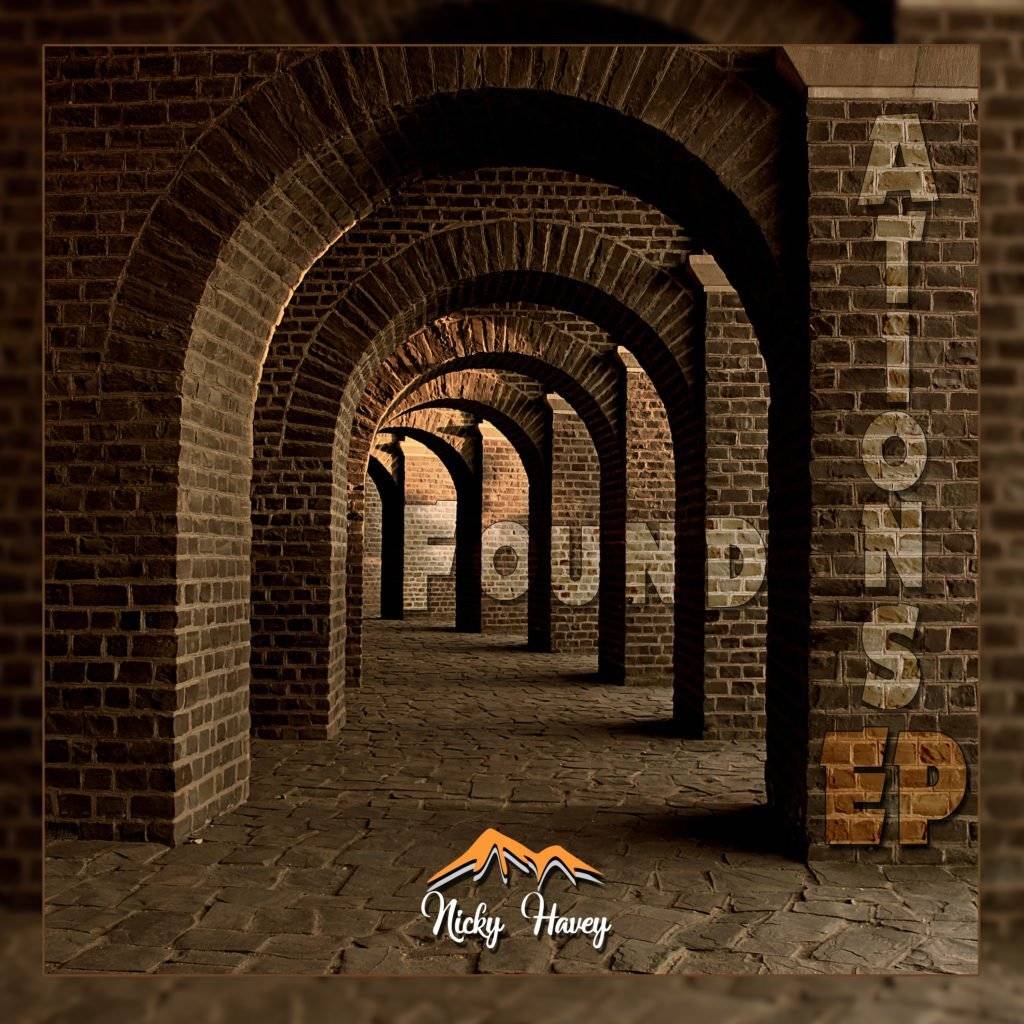
Front cover of the Foundations EP made by Gabriela
Story So Far
Well, why not revisit the "rock pool" analogy from the previous post that went through "I Got Something to Say"? The 6 tracks of Foundations are like individual “rock pools” of music, loosely connected together on a small part of the beach that represents my PhD life. The first rock pool held secrets to a “Magic: The Gathering” world as we found ourselves being influenced by this fantasy card game with “Broken Magic“.
As we follow the water trail to the 2nd rock pool, we discover a new species of “Havey Crustacean”, which appears to be whizzing around at a frenetic pace. When we get closer to him, we can hear his thoughts to himself, "I Got Something to Say". But as things settle down, this crustacean has heard from other creatures in this rock pool about the UK "3 Peaks" Challenge which was not for the fainthearted so he set his sights on that.
Ready to Blog & Earn?
With TravelFeed, easily start your own travel blog and earn as you go. It's the smart platform for travelers who want to profit from their passion. Create a free account
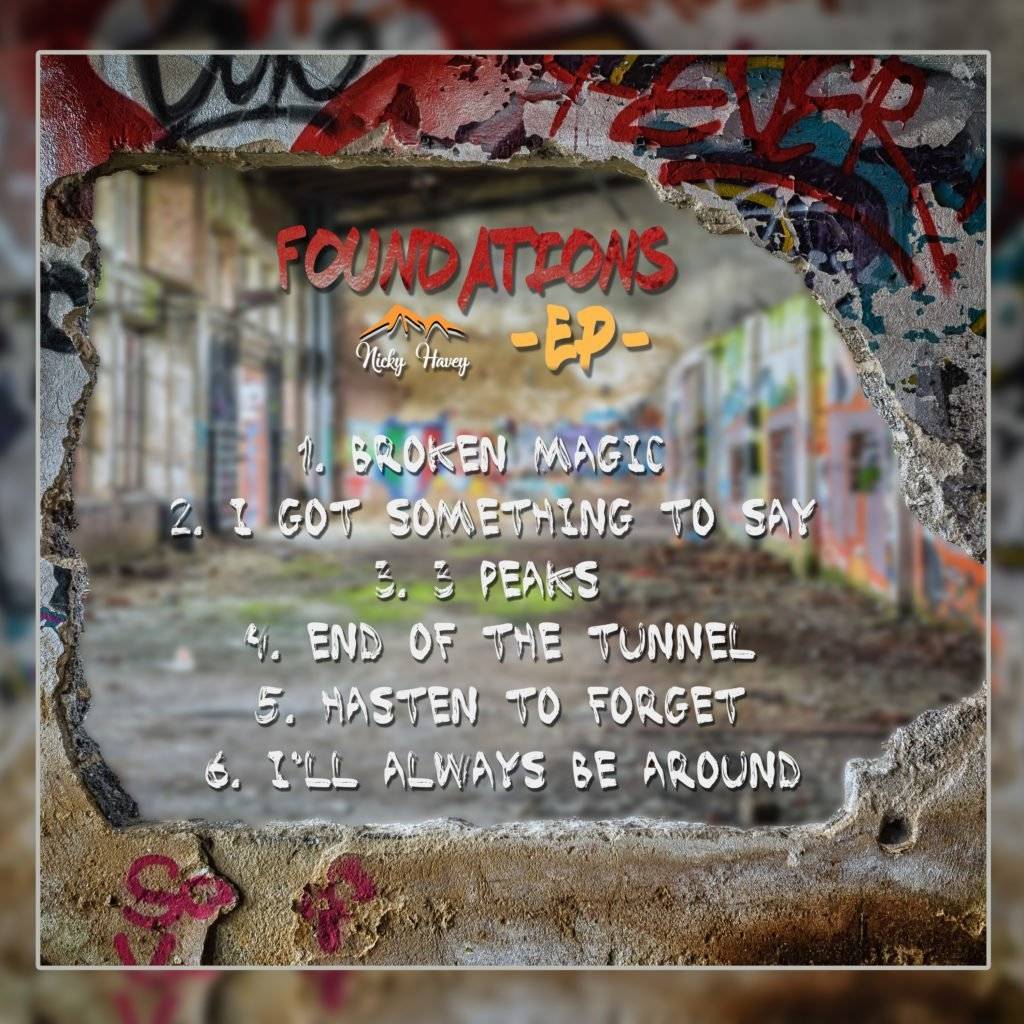
Back cover of the Foundations EP made by Gabriela
3 Peaks is the 3rd of 6 tracks in the Foundations EP. If you're on my website, you can listen to the EP below, otherwise, click here to play it on a new music streaming platform called Choon. If you don't have a Choon account, you can set one up here.
Big thanks to the Audio Animals for their mastering expertise on this one and it’s good to officially release the tracks from the Foundations EP, they’ve been a long time coming! And it wouldn’t be complete without the awesome artwork skills of @gabrielatravels – thank you!
Where Can I Get The EP?
Take your pick of course but the website is probably the best bet – click here to be taken to the store. If you’re more of an iTunes, Spotify or Amazon person, I have you covered there too although you may have to hold on to your hats for official release day on April 12th 2019 – here’s the “pre-save” link for you.
Thanks to everyone who’s streamed, commented, added to playlists and shared the love on all the music I make – stay awesome!
Coming Up Next…
Well that was a colossal post wasn't it! I'm going to be working my way through the rest of the Foundations EP in the next couple of weeks before I go away so keep on the lookout for End of the Tunnel but I will do my best to get another “Making Of” video done before I go! Music for the next few weeks, then it’s travel blogs after that! How’s that for a plan?!
Don't Forget: Get Travel Health Insurance!
To make your trip a worry-free experience, TravelFeed recommends SafetyWing Nomad Insurance. It provides comprehensive health coverage while you travel, so you can focus on exploring, not the unexpected. Get a quote here
Until then, take it easy!
Nicky


Posted from my blog with SteemPress : https://nickyhavey.co.uk/2019/03/haveys-guide-to-completing-the-uk-3-peaks-challenge-liquid-drum-bass/
Travel Resources for your trip to United Kingdom
Recommended by TravelFeed
Flights: We recommend checking Kiwi.com to find the best and cheapest flights to United Kingdom.
Accomodation: Explore the best places to stay in United Kingdom on Booking.com, Agoda and Hostelworld.
Travel Insurance: Medical emergencies abroad can be pricey, but travel health insurance is not. We always use SafetyWing for affordable and reliable coverage.
Car Rental: For hassle-free car hiring, DiscoverCars is our trusted choice with a wide selection of vehicles.
Internet: Got an eSIM compatible phone? Airalo is perfect for reliable internet access during your trip. Just install it before you go, and you're set!
Day Trips & Tours: We recommend GetYourGuide for a variety of well-organized and enjoyable activities.
Travel Planner: Need a hand planning? Our free travel planner chatbot is your personal guide to United Kingdom. Chat now.
Disclosure: Posts on TravelFeed may contain affiliate links. See affiliate disclosure.
