Access the Editor
- Go to your TravelFeed dashboard.
- Click "Publish" in the sidebar to start crafting your new post.
You’re now in what we call the EasyEditor - your canvas to craft your travel tales!
Using the Block-based Editor
- Enjoy creating posts with a block-based editor - no need for coding or HTML skills!
- A "plus" button appears as you start a new paragraph. It's also accessible via the "tab" key, and it unveils a menu to insert a new block of your choice.
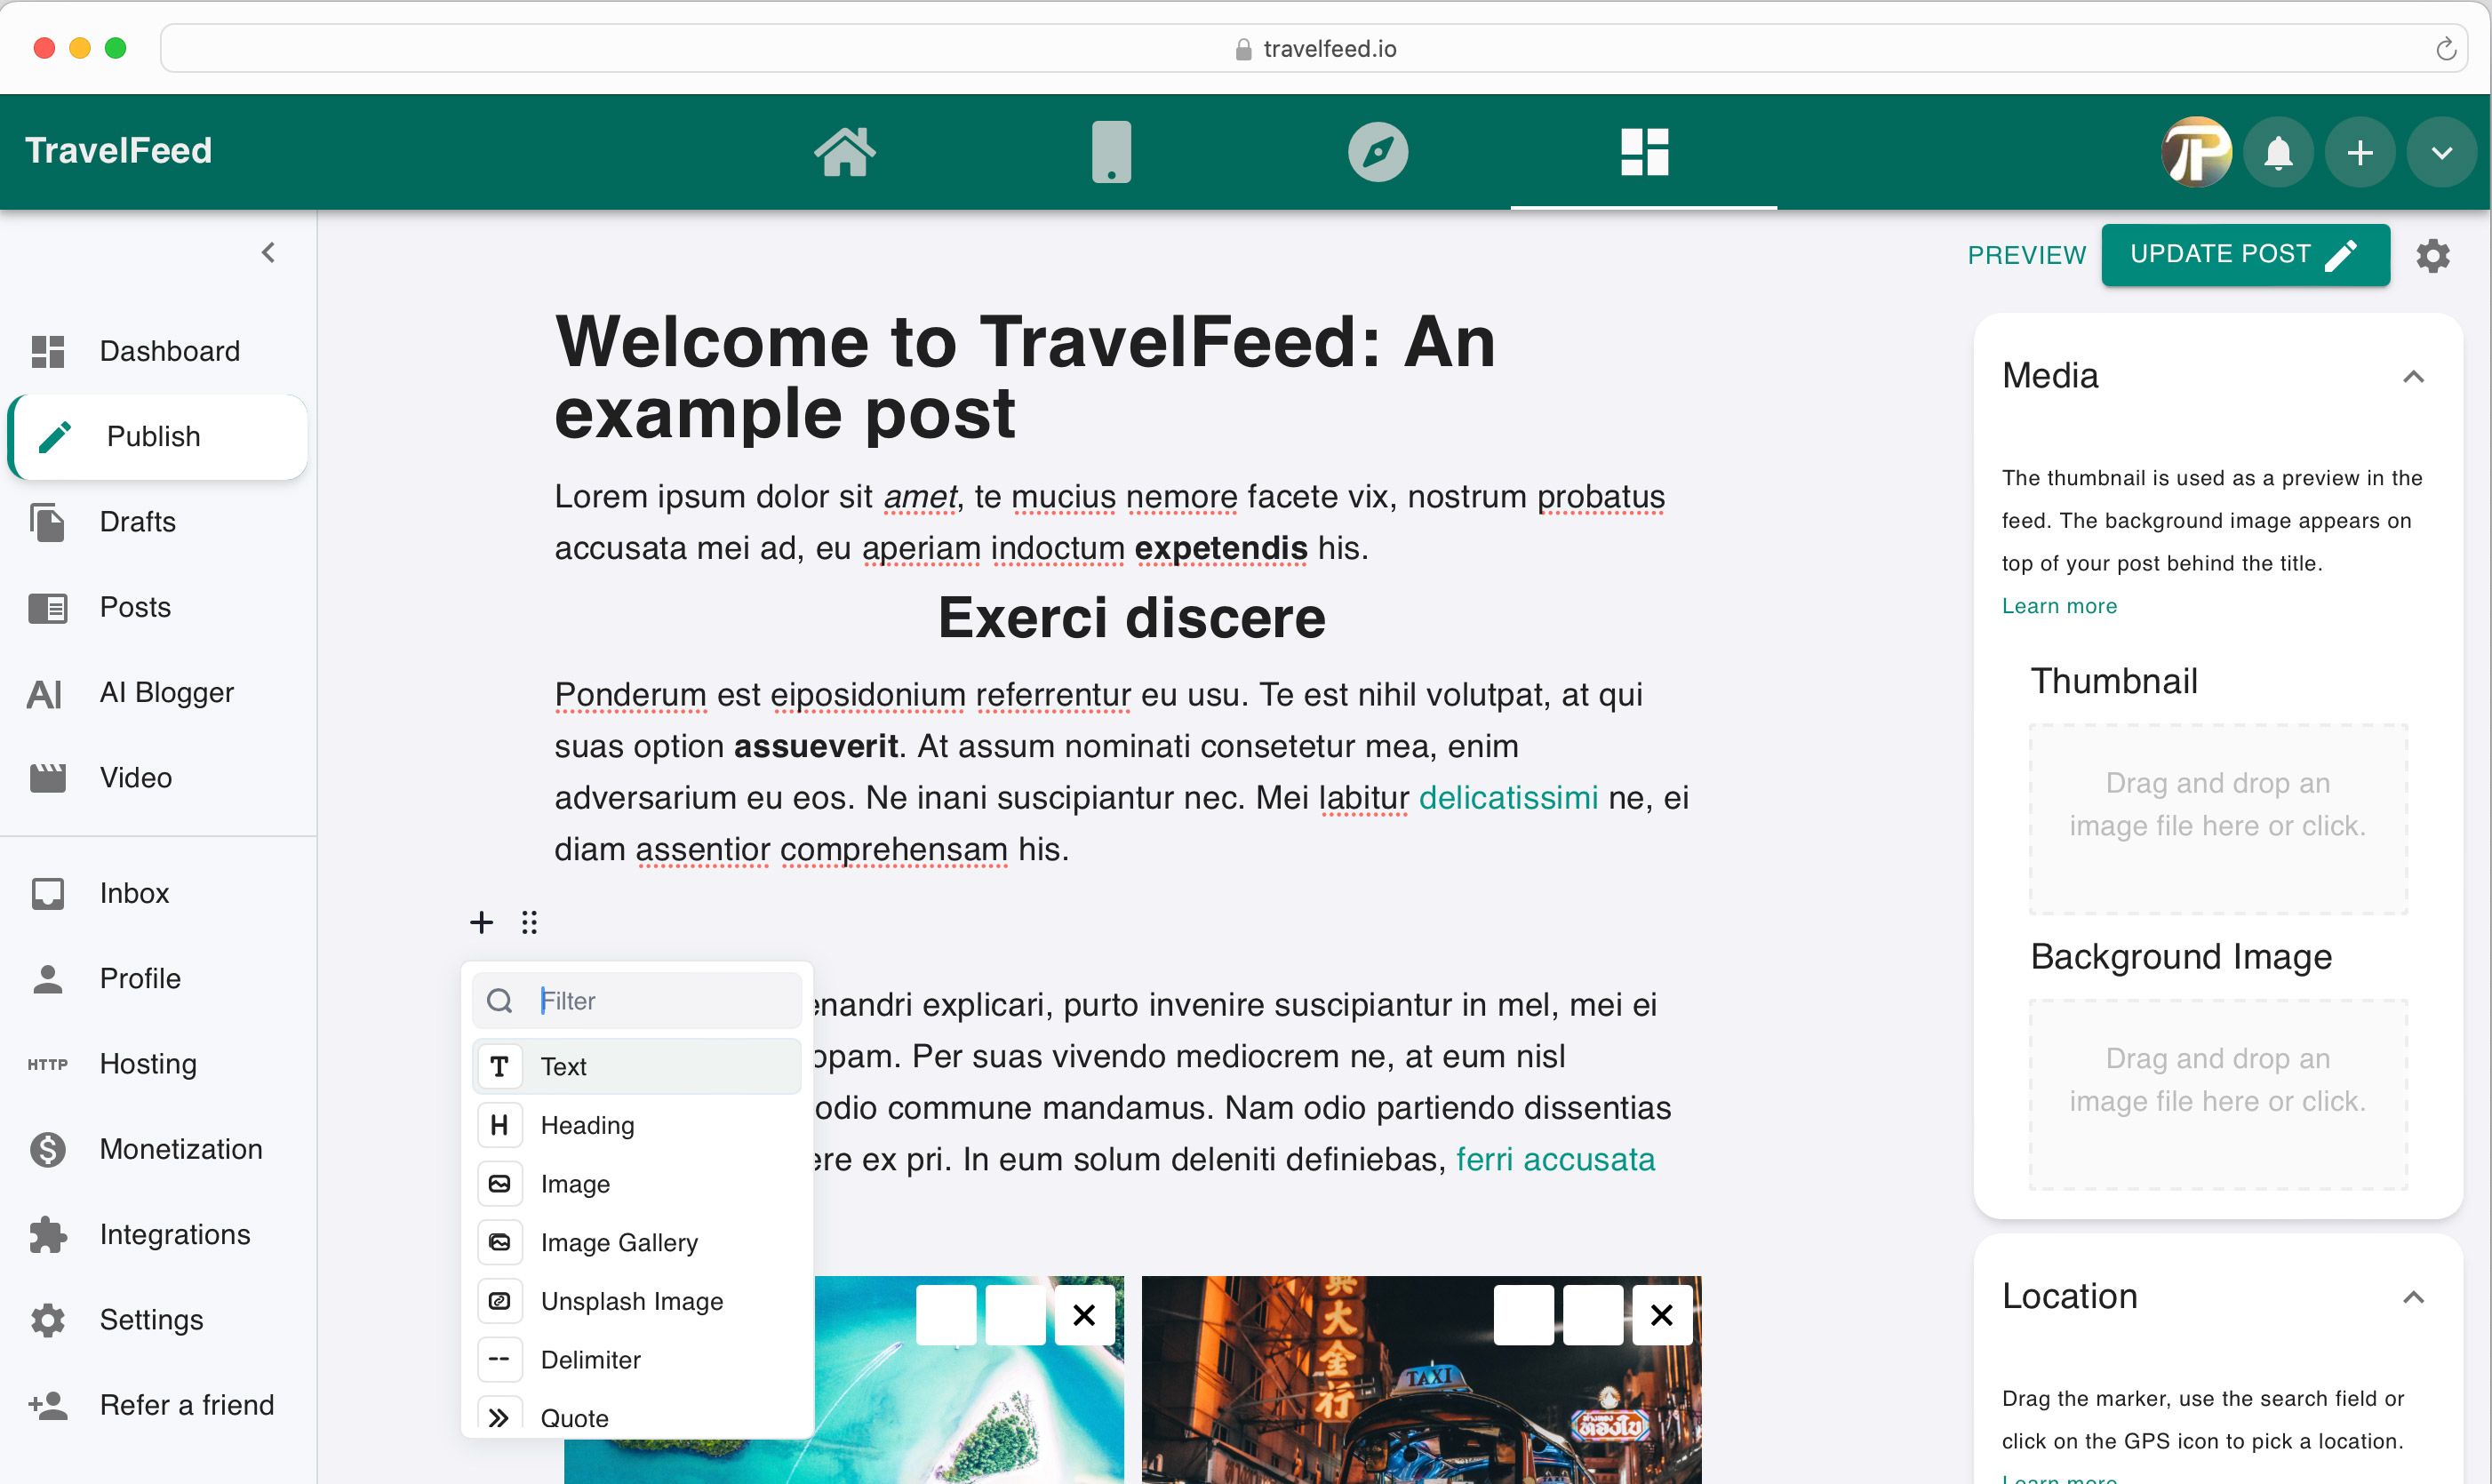
Enhance Your Post with Blocks
There are various blocks you can use to enhance your post. Each name links to more information.The available blocks are:
- Text: The default block - tell your story.
- Heading: To emphasize sections of your post.
- Image: To add pictures.
- Image Gallery: To display a collection of photos.
- Unsplash Image: To embed images from Unsplash or external images
- Delimiter: To add space between two sections.
- Quote: To share memorable quotes.
- List: For bullet points or numbered lists.
- Table: To organize information.
- Table of Contents: Automatically generated based on your headings.
- Internal Link: To link to other sections of your post or other posts. This also lets you embed itineraries.
- Button: To create clickable buttons.
- Spoiler: To create expandable spoiler sections.
- Raw HTML: To insert raw html.
Tweak and Tune Your Blocks
In the top left of each block, right of the plus icon, you will find the tunes symbol (six dots). When you click it, you will see options for the block. For example, for a text block, you can select the text orientation (left, center, justify), for a heading you can select the heading level (how big it is) and for an image gallery, you can choose between masonry and gallery layout.
Embedding External Content
Enhance your post with embedded content. See how to embed content from each platform by clicking on their names below:
- Youtube
- Vimeo
- Facebook Watch
- Google Maps
- Spotify
- Soundcloud
- mapa turystyczna
Using HTML and Markdown: A Little Heads-Up!
While HTML and Markdown are cool for those in the know, it’s not always the easy path for everyone. So, unless you're a bit of a tech wizard, staying in EasyEditor usually keeps posting fun and frustration-free!
Keep it Simple with Snippets: For tiny bits of HTML or Markdown, just use the Raw HTML block. It's easier and does the trick for small tasks!
A Quick Guide to Switching Editors:
- Step 1: Look for a button down in the bottom right corner of the editor.
- Step 2: Give it a click, and ta-da, you’re in the HTML and Markdown editor!
But Wait, A Few Tips First:
- Not Always Two-Way: Some neat stuff from the EasyEditor (image galleries, buttons, table of contents, internal link,... cannot be added in the HTML and Markdown editor).
- Conversion Caution: Changing back to EasyEditor turns your post into Raw HTML blocks. So, tweaking it might be a bit of a puzzle.
After mastering the editor, it's time to explore the other important options on the publish page to make your post more engaging and discoverable:
Creating a Title
Enter a catchy title for your post. Need suggestions? Click on the "AI" button next to the title field for creative ideas.
Setting Up Metadata in the Sidebar
- Media: Upload a captivating thumbnail. If not, the first image in your post will be used. Optional: Upload a background image (cover image) for your post
- Location: Pinpoint the location of your travel story either by dragging the pin on the map or using the search feature. Select the appropriate category based on your location.
- Topics: Tag your post with relevant keywords. If you have no location, add the topic "traveladvice".
- Explore SEO and Visibility settings as you become more comfortable with blogging.
Publishing Your Post
You can see a preview of your post witht the "preview" button at the top right.
Click the "Publish" button at the top right, then confirm with "Publish Now". You can also schedule posts.